Customize AI Features
Qrvey Sidekick is an AI-powered conversational interface that enables users to interact with the Qrvey MCP server, through various AI agents, using natural language. As a Qrvey Administrator, you can enable, configure, and manage Qrvey's AI features and the available AI agents from the Admin Center. Developers can then embed the Sidekick directly into their applications.
From the Admin Center, you can open the page by selecting the AI Features Customization icon in the left navigation panel:

Connect to an AI Provider
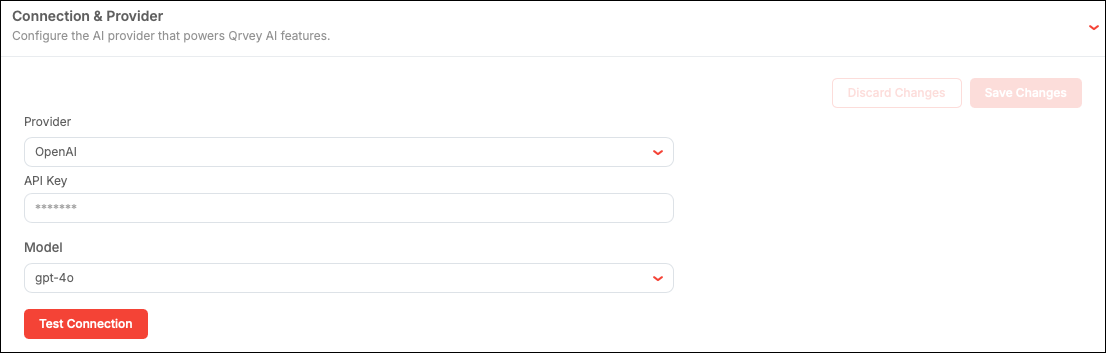
Administrators can enable and configure Qrvey's AI features from the Connection & Provider tab.
Note: JWT authentication is required for all Sidekick integrations.
-
Select an AI provider from the dropdown.
-
Add the credentials and connection information for your provider:
OpenAI
Field Required Description Example / Format API Key Yes Secret key copied from the OpenAI dashboard. sk-proj-xxxxxxxxxxxxModel No GPT model to use for AI features. Common models include:
-gpt-4o- Most capable multimodal model (recommended)
-gpt-4o-mini- Faster and more cost-effective
-gpt-4-turbo- High capability with large context
-gpt-3.5-turbo- Lightweight and economicalgpt-4oAzure OpenAI
Field Required Description Example / Format API Key Yes One of the two API keys from the Azure portal (Keys and Endpoint section). a1b2c3d4e5f6...Endpoint URL Yes Endpoint URL from the Azure portal. Include the full URL with https://.https://my-resource.openai.azure.com/Azure Model ID No Deployment Name you set when deploying the model. Leave blank to use the platform default. my-gpt4oAPI Version Yes Azure OpenAI REST API version. The platform pre-fills a tested default. 2023-12-01-previewClaude in Amazon Bedrock
Field Required Description Example / Format Access Key ID Yes AWS IAM access key ID for programmatic access. AKIAIOSFODNN7EXAMPLESecret Access Key Yes AWS IAM secret access key paired with the access key ID. wJalrXUtnFEMI/K7MDENG...AWS Region Yes AWS region where Bedrock and the Claude model are available. us-east-1Model No Bedrock model identifier for the Claude version to use. To use the platform default, leave this field blank. anthropic.claude-3-5-sonnet-20241022-v2:0 -
Select Test Connection to validate Qrvey's connection to the model.
-
After you have validated the connection, save your changes.
Troubleshooting
The following sections describe common issues encountered when creating a connection to an AI provider.
OpenAI
| Issue | Resolution |
|---|---|
| Incorrect API Key | Verify there are no leading or trailing spaces when pasting. |
| Quota exceeded | Add billing credits. |
| Model not found | Verify the model name is spelled correctly and your account has access. |
Azure OpenAI
| Issue | Resolution |
|---|---|
| 401 Unauthorized | API Key is incorrect. Verify it matches KEY 1 or KEY 2 from the portal. |
| 404 Not Found | Check the Endpoint URL and ensure the Model Deployment exists. |
| DeploymentNotFound | Azure Model ID doesn't match any deployment. Check exact capitalization. |
| API Version error | If you receive a version-related error, update the API Version field to the latest in the Azure OpenAI in Microsoft Foundry Models REST API reference. |
Claude in Amazon Bedrock
| Issue | Resolution |
|---|---|
| AccessDeniedException | The IAM user does not have bedrock:InvokeModel permission, or model access was not approved. |
| UnrecognizedClientException | The access key ID or secret access key is incorrect. |
| ValidationException | Invalid Model ID format. Copy it from the Bedrock console. |
| Region mismatch | Verify the selected AWS Region matches the region where you enabled model access. |
Manage AI Agents
When your AI provider has been connected, the following AI agents are available (default: disabled). They use Qrvey's MCP server.
- Qrvey Smart Analyzer
- Qrvey Analytics Assistant
- Qrvey AI Chart Builder
- Qrvey Pixel-Perfect Report Builder
- Qrvey Formula Assistant
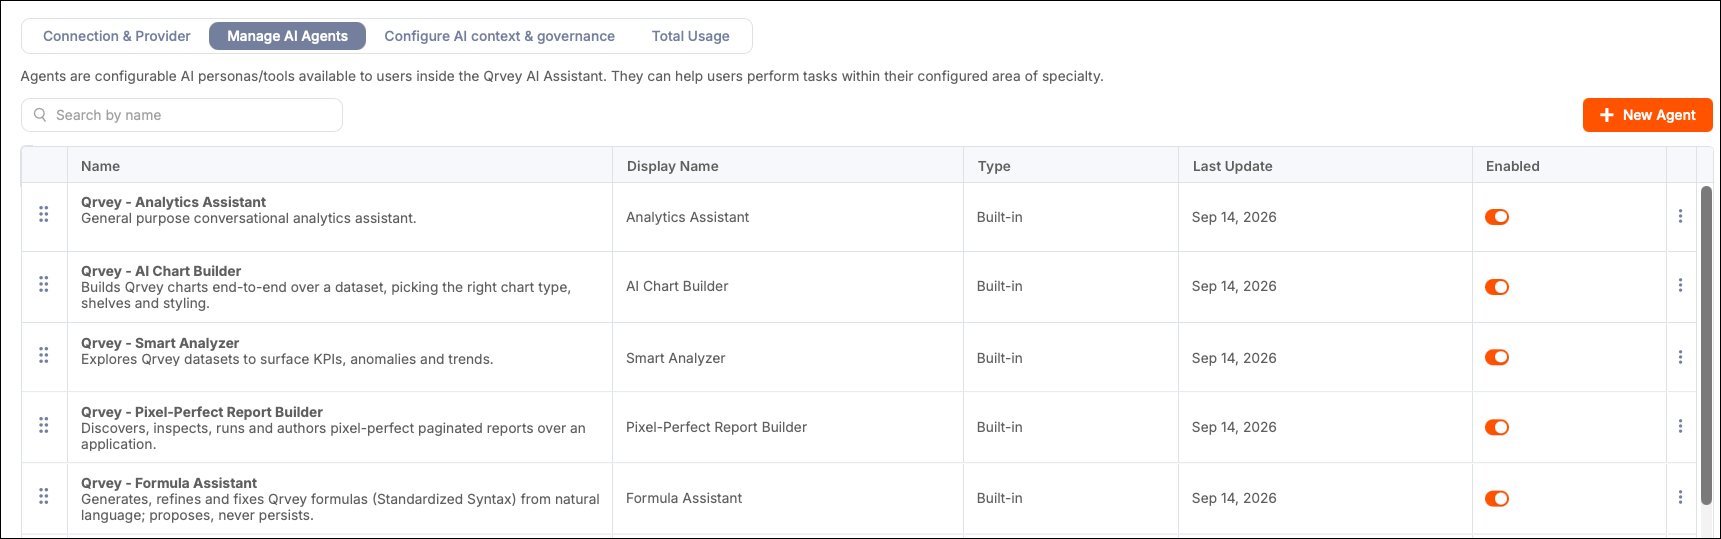
Select a toggle in the Enabled column to enable or disable an agent.
While you cannot edit the configuration settings for these built-in agents, you can change their names and descriptions. You can use the options menu to duplicate an existing agent and edit its settings. However, the keyword Qrvey is reserved for built-in agents and cannot be used during customization.
Create an AI Agent
From the Manage AI Agents tab, you can create additional agents that incorporate business- or industry-specific criteria.
-
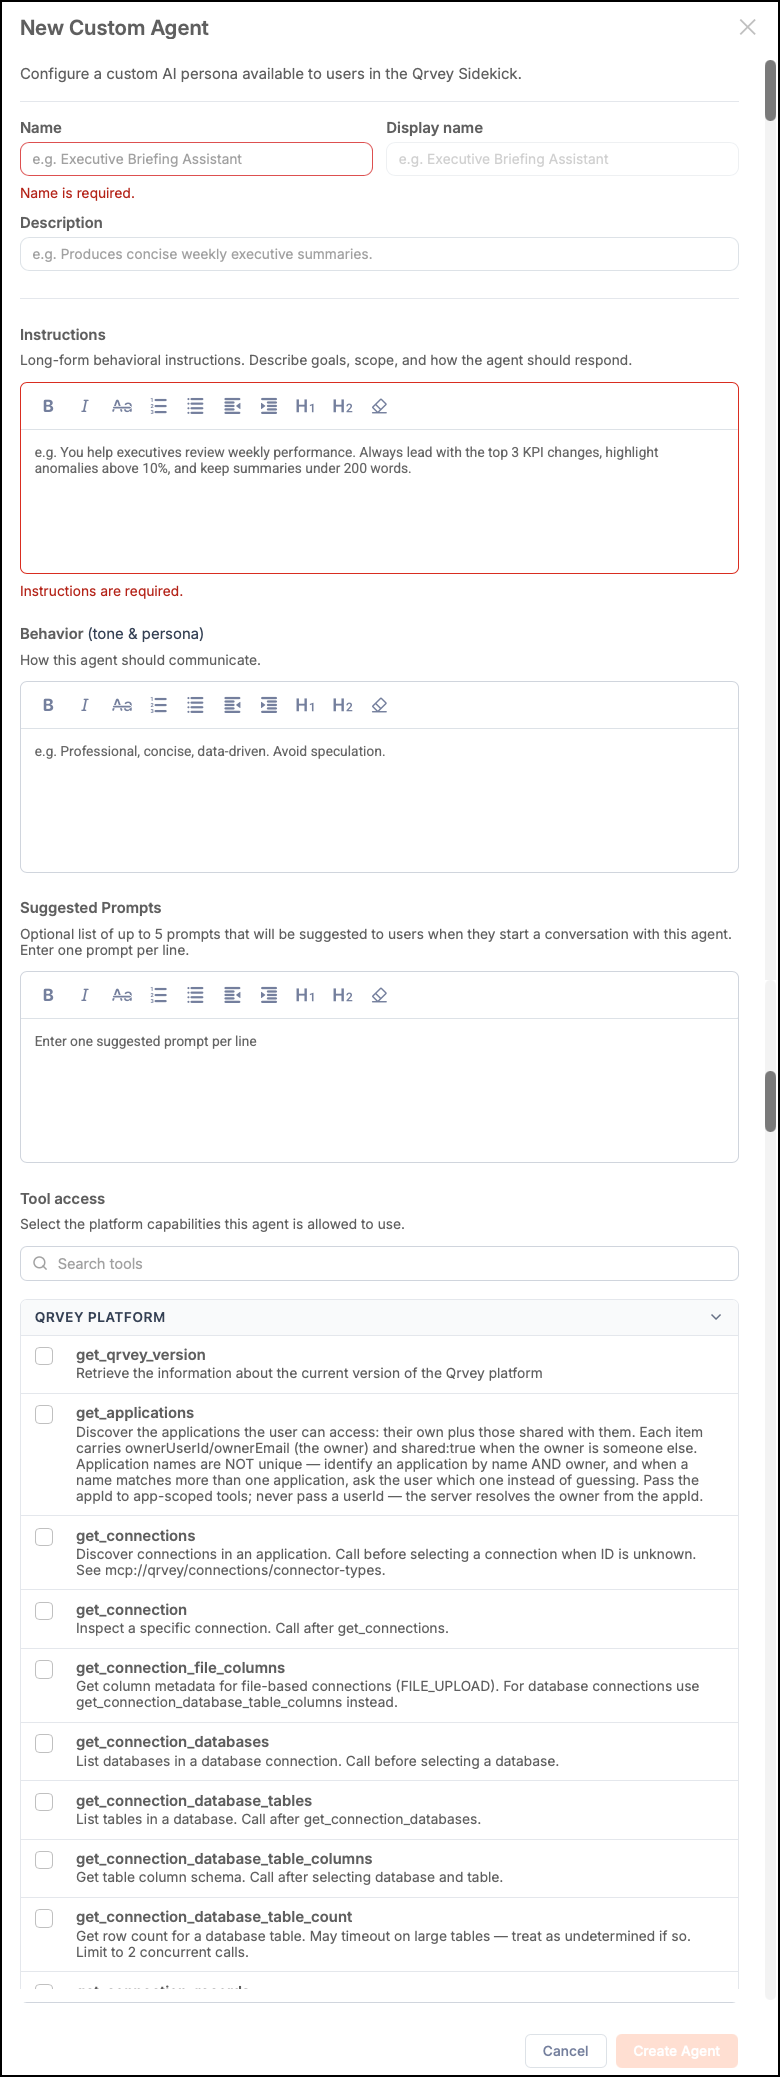
To create a new agent, select New Agent to open a modal.
-
Add a name (system ID), display name, and description in the fields provided.
-
In the Instructions field, add long-form prompts to help the agent generate its responses. These prompts can capture goals, scope, and constraints.
-
In the Behavior field, add prompts to capture tone and persona when the agent generates its responses.
-
In the Suggested Prompts field, add prompts to provide suggestions to users when interacting with the agent.
-
In the Tool access section, select one or more capabilities used by this agent.
-
Select Create Agent to save the configuration.
If you create multiple agents, you can drag and drop them within the Manage AI Agents panel to change their display order when a user opens the Sidekick.
Add Context and Governance Instructions
From the Configure AI Context & Governance tab, you can add business-level instructions to provide additional context to Sidekick's system-level instructions, improving the accuracy and relevance of AI responses for specific customers.
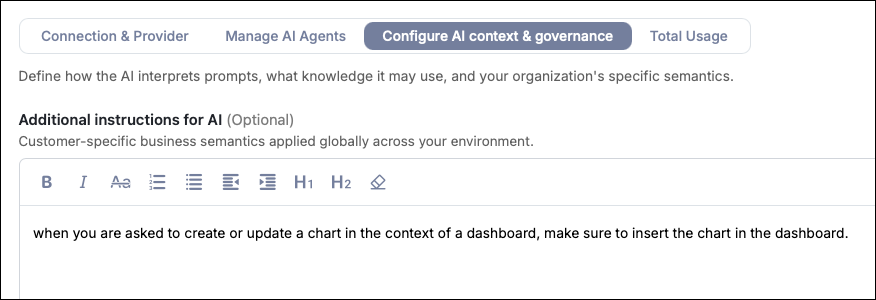
Such instructions include the following:
- Define business-specific terminology. These instructions are always applied when present.
- Specify preferred aggregation methods (agent level). These instructions are applied only when using the agent.
- Provide context about the data source (entity level). These instructions are applied when the entity is used in any context.
View Token Usage
Use the Total Usage tab to track your AI token consumption. The tab displays a list of all organizations on your account, showing the current billing period by default.
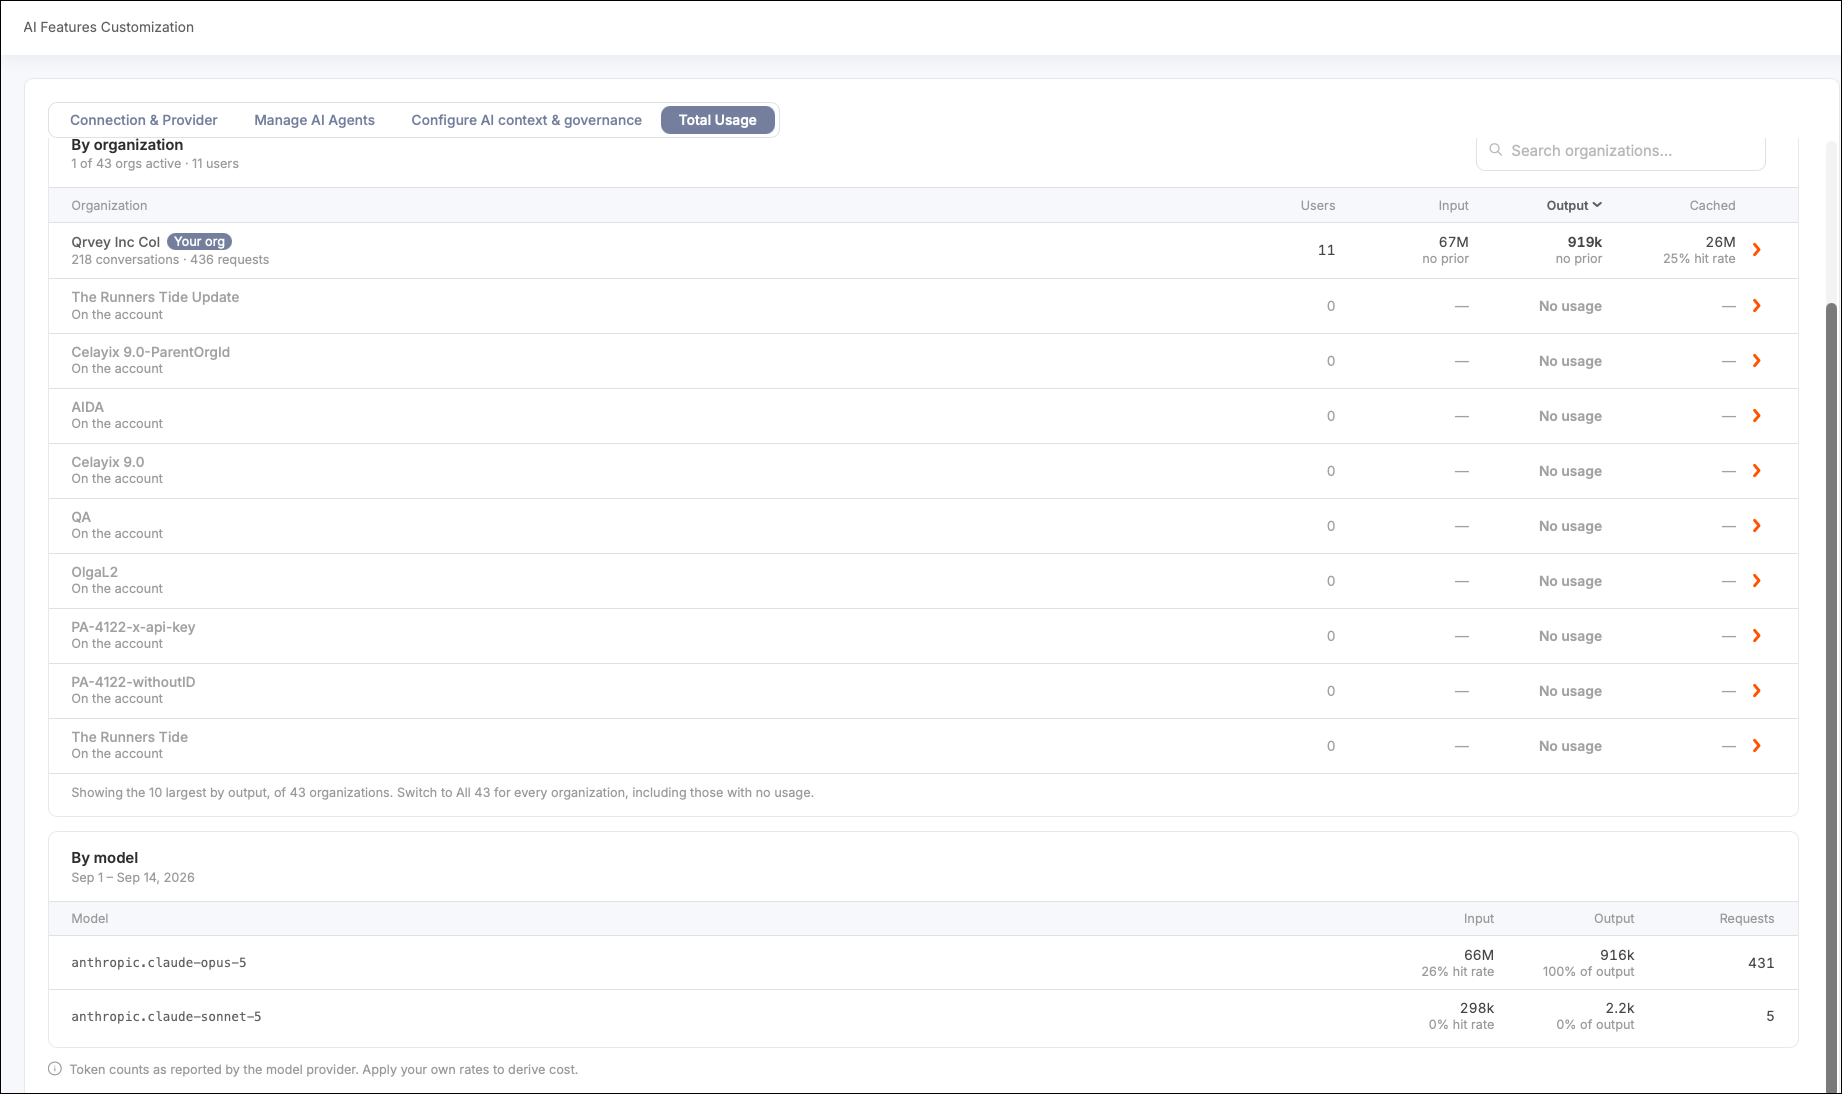
Qrvey reports the token count each AI provider bills for. Apply your own rate to calculate cost.
Usage recording started on a specific date for your account. Days before that show as no history, which is different from a day that was measured and had zero usage.
Summary Metrics
At the top of the page, the following figures summarize AI usage for the selected period. They are typically billed at different rates.
- Input tokens — Text sent to the AI model: prompts, conversation history, and any context the request included.
- Output tokens — Text the AI model generated in response.
- Cached input tokens — Portion of input tokens reused from an earlier request instead of being reprocessed. This is also displayed as a percentage of total input, because a higher cache rate generally means lower cost for the same work.
Change the Reporting Period
By default, the page displays the current billing period. Use the period selector to select Previous period, Last 90 days, or Custom range. To define a custom range, enter a start and end date.
Review Usage by Organization
The By organization table lists every organization on your account for the selected period, including:
- Number of active users
- Input tokens
- Output tokens
- Cached tokens
To drill down into usage for a specific organization, select a row in the table.
Review Usage by AI Model
The By model table displays the models driving the token usage across organizations, listing input tokens, output tokens, and request count for each AI model configured on your account.