Customize Your Qrvey Instance
As an administrator, use Qrvey Admin Center's Customization page to customize your Qrvey Composer instance for your business.
General Settings
From the Admin Center, open the page by selecting the Customization icon in the left navigation panel. The General Settings tab opens, where you can change settings related to your organization.
View Qrvey License and Account Information
-
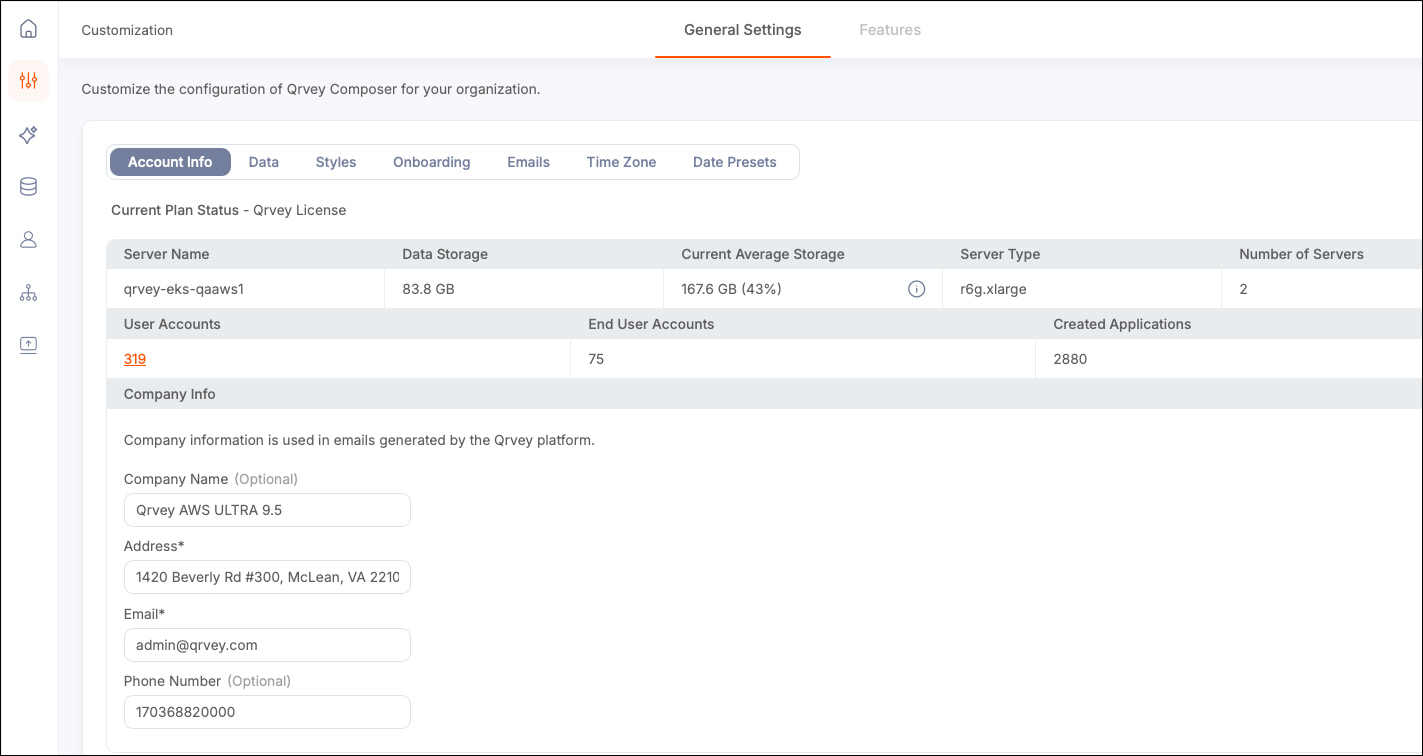
From General Settings, select the Account Info tab to display the following information:
- Current plan status
- Server name (Elasticsearch cluster). For more information about servers, see Infrastructure Management.
- Data storage (GB)
- Current Average Storage (GB)
- Server type
- Number of servers
- User accounts created in Admin Center. For information about user accounts, see User Management.
- End user accounts created in Composer (supported only in legacy dashboards)
- Created applications
- Company information (included in emails generated by the Qrvey platform)
Update Company Information
The Qrvey platform displays your company information and includes it in emails sent from the platform.
From the Account Info tab, add the following information to the Company Info section:
- Company name
- Address
- Email (used in the company email signature)
- Phone number
Define NULL Handling
Use the Data tab to set global defaults for managing NULL values in the platform. By default, these values appear as blank entries in raw data displays.
NULL values are not counted in aggregations, as a group, or as a category. If a group contains no data, it is not included in analytics.
-
Select a visual indicator for how NULL values are represented in a field.
- Blank - Leaves the field empty.
- [NULL] - Field contains a
[NULL]entry. - Custom Text - Add a custom text string.
-
Select the default action for handling NULL values in analytics.
- Ignore - Excludes NULL values from groups and categories.
- Include - Treats NULL as its own category. Includes the values in Count and Distinct Count, and Average aggregations.
Note: You can also transform NULL values by adding a Transformation to your dataset.
Customize the Look and Feel of Qrvey Composer
You can change the visual style of Qrvey Composer to match your organization’s style.
-
From General Settings, select the Styles tab to display styling options and a preview pane.
-
You can perform the following actions:
-
Upload a logo.
-
Specify the title to appear on the browser tab.
-
Upload a favicon (favorite icon).
-
Change the color scheme:
- Main
- Secondary
- Tab bar
- Tab font
- Form icons
You can view the changes in the preview panel.
-
-
To save your changes, select Save Changes. To restore default style settings, select Restore to Default.
Customize the Login Page
You can customize the look and feel of the Login page when users open Qrvey Composer.
-
From General Settings, select the Onboarding tab.
-
Edit the following fields as needed.
- Title: To hide the title, disable Show title.
- Login Message: To hide the login message, disable Show Login message.
You can view the changes in the preview panel.
-
To save your changes, select Save Changes. To restore default style settings, select RESTORE TO DEFAULT.
Email Settings
Qrvey Composer automatically sends a Welcome email message to users when their accounts are created. The system also sends a Forgot Password email message when users forget their passwords.
To change email settings, select the Emails tab in General Settings.
Configure Email Provider
You can use AWS SES, Azure ACS, or an SMTP email provider. By default, Qrvey Composer uses AWS SES.
To configure an SMTP email provider, select a sending method:
-
From the Emails tab, select Email Provider.
The Configure an Email Provider radio button is enabled by default. You cannot disable this setting.
-
Complete the following fields by adding valid information specific to your provider type:
- Server URL
- Port number
- Encryption type (STARTTLS, TLS, or SSL)
- From email (Configured in AWS. Optional, depending on the requirements of the email provider.)
- User name
- Password
-
Test your configuration.
a. Select Test Connection.
b. In the modal, add a valid email address and message text, then select Test.
The modal displays a message containing the test result.
-
Select Save Changes to save your settings.
Design Email Templates
You can customize the look and feel of the templates used for Welcome and Forgot Password emails.
-
From the Emails tab, select Templates.
-
Select an email template (Forgot Password or Welcome/Onboarding) from the dropdown list. The editor below updates to display the selected template.
-
Add your subject text in the Email Subject field.
-
Add your body text in the email body area. You can use the toolbar options to adjust the format of the email body.
-
Add the appropriate variable to the email body:
- Forgot Password:
{{mail.resetlink}} - Welcome/Onboarding:
{{mail.password}}
- Forgot Password:
-
To preview the changes, select Preview.
-
To save your changes, select Apply Changes.
View Email Activity Log
Qrvey Admin Center maintains logs of email activity.
From the Emails tab, select Activity Log. The email log displays.
- To filter the logs, select an option from the dropdown list.
- To conduct a full-text search for a log, start typing in the Search field.
- To download the log locally (TXT), select Download Log File.
- To refresh the logs displayed on the page, select Refresh.
Set Time Zone
Qrvey Admin Center enables you to specify the default time zone. Changing the time zone affects how dates are displayed and filtered for users throughout the Qrvey platform. The time zone settings do not change how data is stored in the repository. They only affect how data is filtered and displayed to end users.
-
From General Settings, select the Time Zone tab.
-
Select one of the following options:
- System Default Settings: Time zone where the data was stored in the Elasticsearch repository (UTC/GMT+0).
- User Browser Settings: Time zone specified in the end user’s browser.
- Fixed Time Zone: Time zone specified in the dropdown list (default: UTC +00:00).
-
Select Apply Changes.
For more information, see Configuring Time Zone Settings.
Date Presets
Use the Date Presets tab to manage named preset date shortcuts that represent specific points or ranges of dates. When enabled, date presets are displayed to users as selectable values in date criteria in the Comparative Analysis panel of the Chart Builder.
Preset Types
| Type | Description | Example |
|---|---|---|
| Fixed | A specific, unchanging point or date range. | January 1, 2025 to December 31, 2025. |
| Dynamic | A range relative to today, resolved to a full calendar unit. | Last Month — resolves to the previous calendar month. |
Dynamic presets can be aligned to a calendar, meaning they snap to a whole calendar unit rather than a rolling window.
- Example: if today is July 7, 2026, then Last Month resolves to all of June 2026.
Because dynamic presets are resolved at the moment they run, a dashboard or scheduled export that uses This Month always reflects the current month, eliminating the need for manual updates.
Enable Date Presets
-
In Qrvey Admin Center, select the Customization icon in the left navigation pane.
-
Select General Settings, then select the Date Presets tab.
-
From the Enabled column, select one or more presets to display to users for selection.
Category Preset Days - Today, Yesterday, Tomorrow
- Last 7, 30 Days
- 7, 30, 60, 90, 120, 365 Days AgoWeeks - This Week, Last Week
- This Week Start, This Week End
- Last Week Start, Last Week EndMonths - This Month, Last Month
- This Month Start, This Month End
- Last Month Start, Last Month End
- MTD (Month to Date)Quarters - This Quarter, Last Quarter
- This Quarter Start, This Quarter End
- Last Quarter Start, Last Quarter End
- QTD (Quarter to Date)Years - This Year, Last Year
- This Year Start, Last Year Start, Last Year Start, Last Year End
- Two Years Ago Start, Two Years Ago End
- YTD (Year to Date)
Features
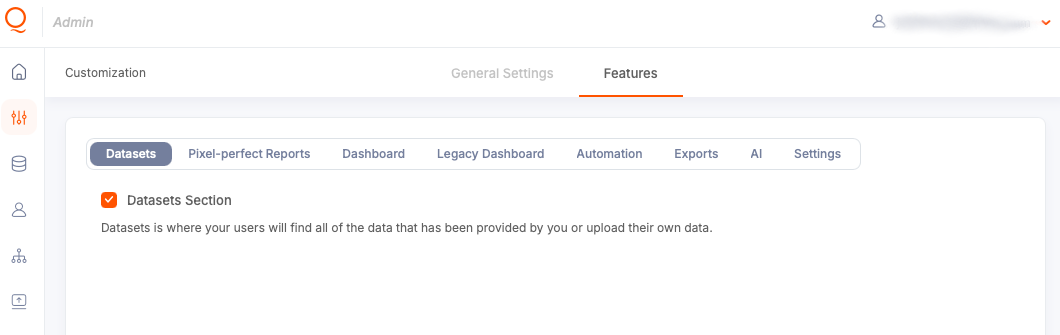
The Features tab provides options to enable and disable features available within Qrvey Composer.
-
In Qrvey Admin Center, select the Customization icon in the left navigation pane, then select the Features tab.
-
Select a tab to enable and disable its features:
About Exports
The Exports tab allows you to manage the following features:
- Exports
-
Select your export location. It can be AWS S3, Azure Blob, FTP, or an SFTP server. You need to define the secure communication protocols for your chosen type.
-
Allow or restrict local exports. You can download files directly to your system or to the export storage.
-
Select an email export option:
- None - You receive an email notification indicating whether the export was successful or failed. The exported file is not attached to the email. Instead, it is stored for access by the Download Manager.
- Include Download link (default) – You receive an email containing a direct link to download the exported files.
- Attach Files - You receive an email with the exported files attached. If the total file size exceeds the size limits set by your email service provider, the email includes a download link to access the files.
-