Google as the OpenID Provider
As a CloudOps engineer, you can set up Google as the OpenID provider usedd for logging into Qrvey.
Overview
To integrate with Qrvey, your OpenID provider account needs to provide the following:
- OAuth 2.0 credentials (realm, clientid, client secret) needed to add user accounts in the Admin Center.
- Redirect URL (Return URL).
You can also customize the branding information that creators see on the user-consent screen.
Set Up Google as an OpenID Provider
The following steps provide an example of how to configure Google as OpenID provider:
-
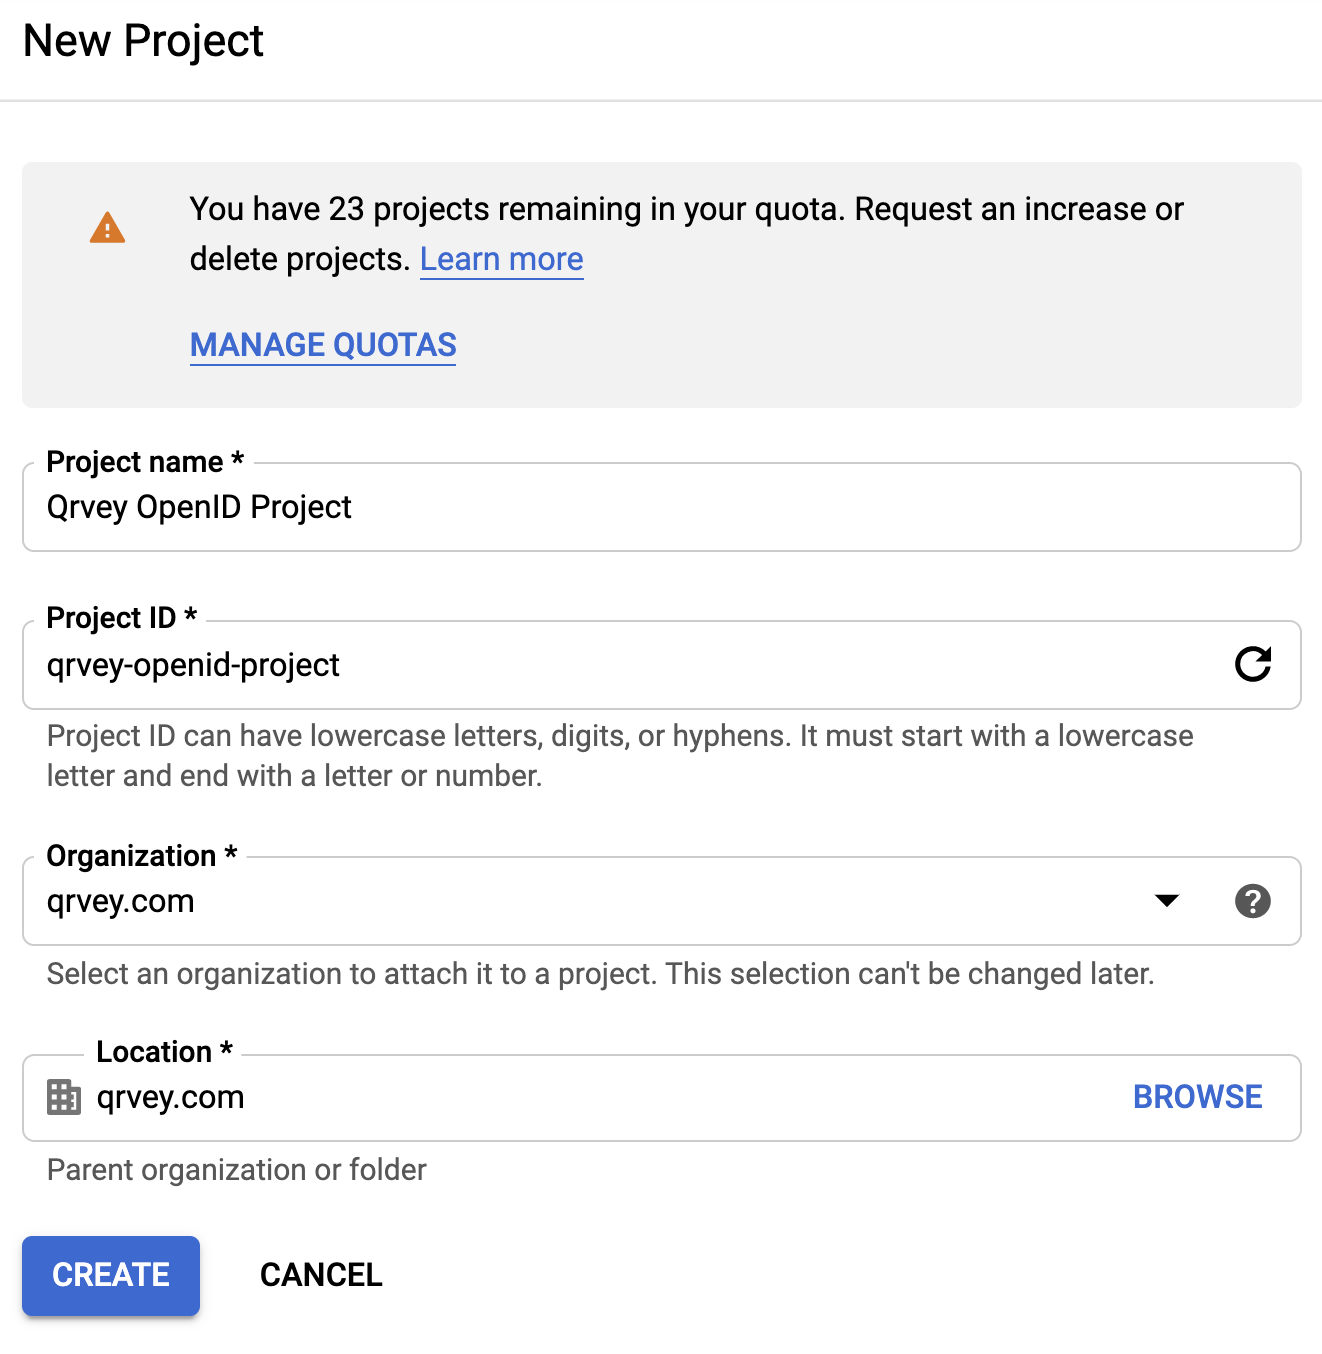
Set up a project in the Google API Console:
-
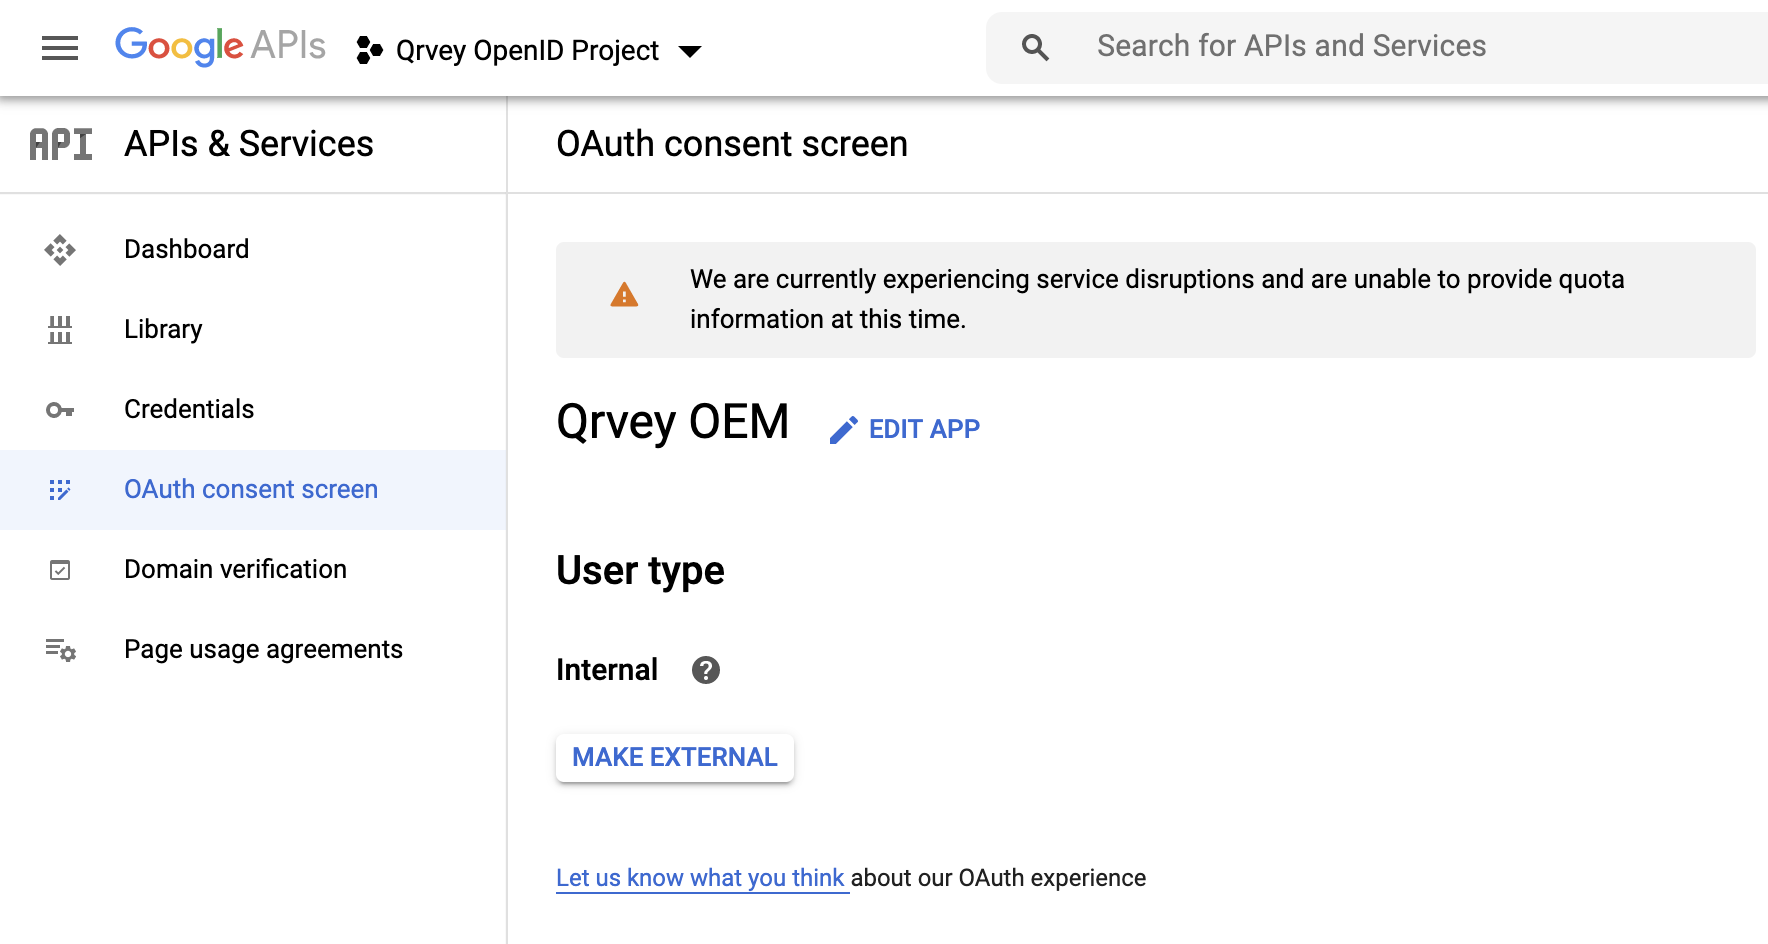
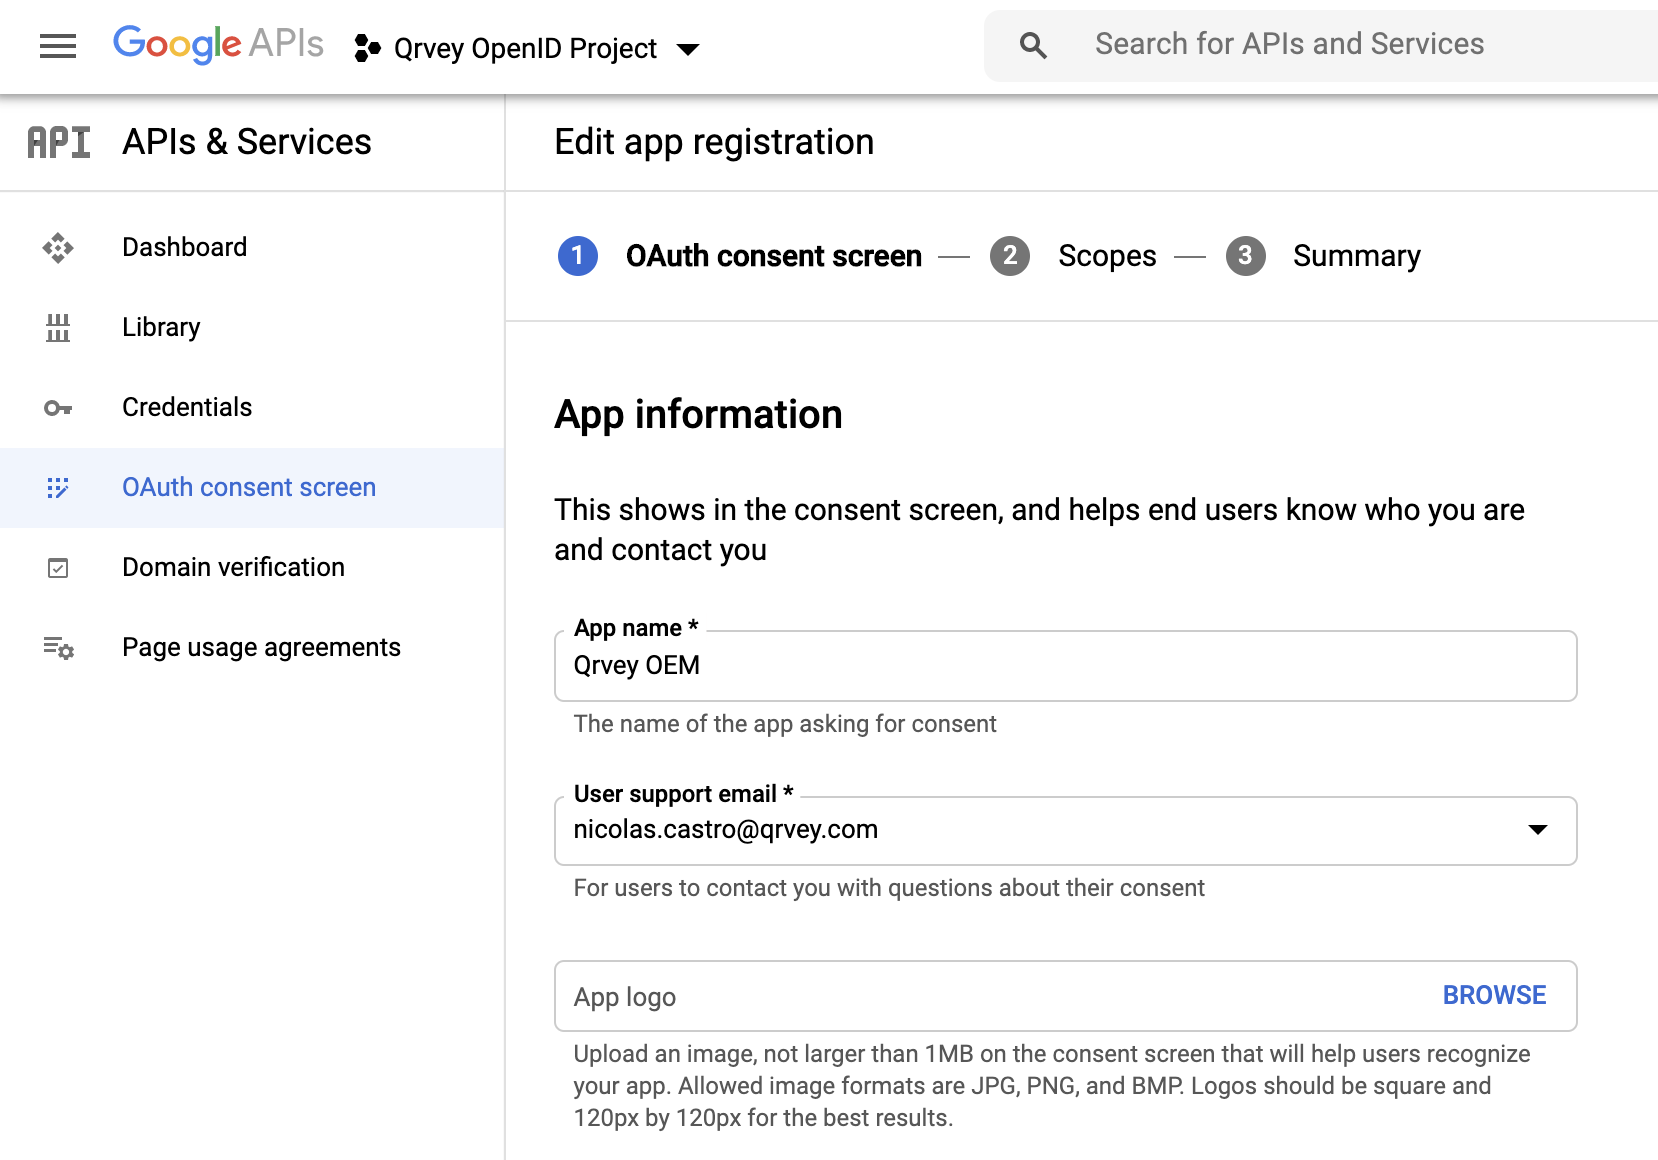
Within your project, create an OAuth consent screen, where you can define the following:
-
How to configure and register your App.
-
Data and permissions the users share or grant to Qrvey when authenticating. In this example, In this case: email, name and last name.

-
-
Name your application.
-
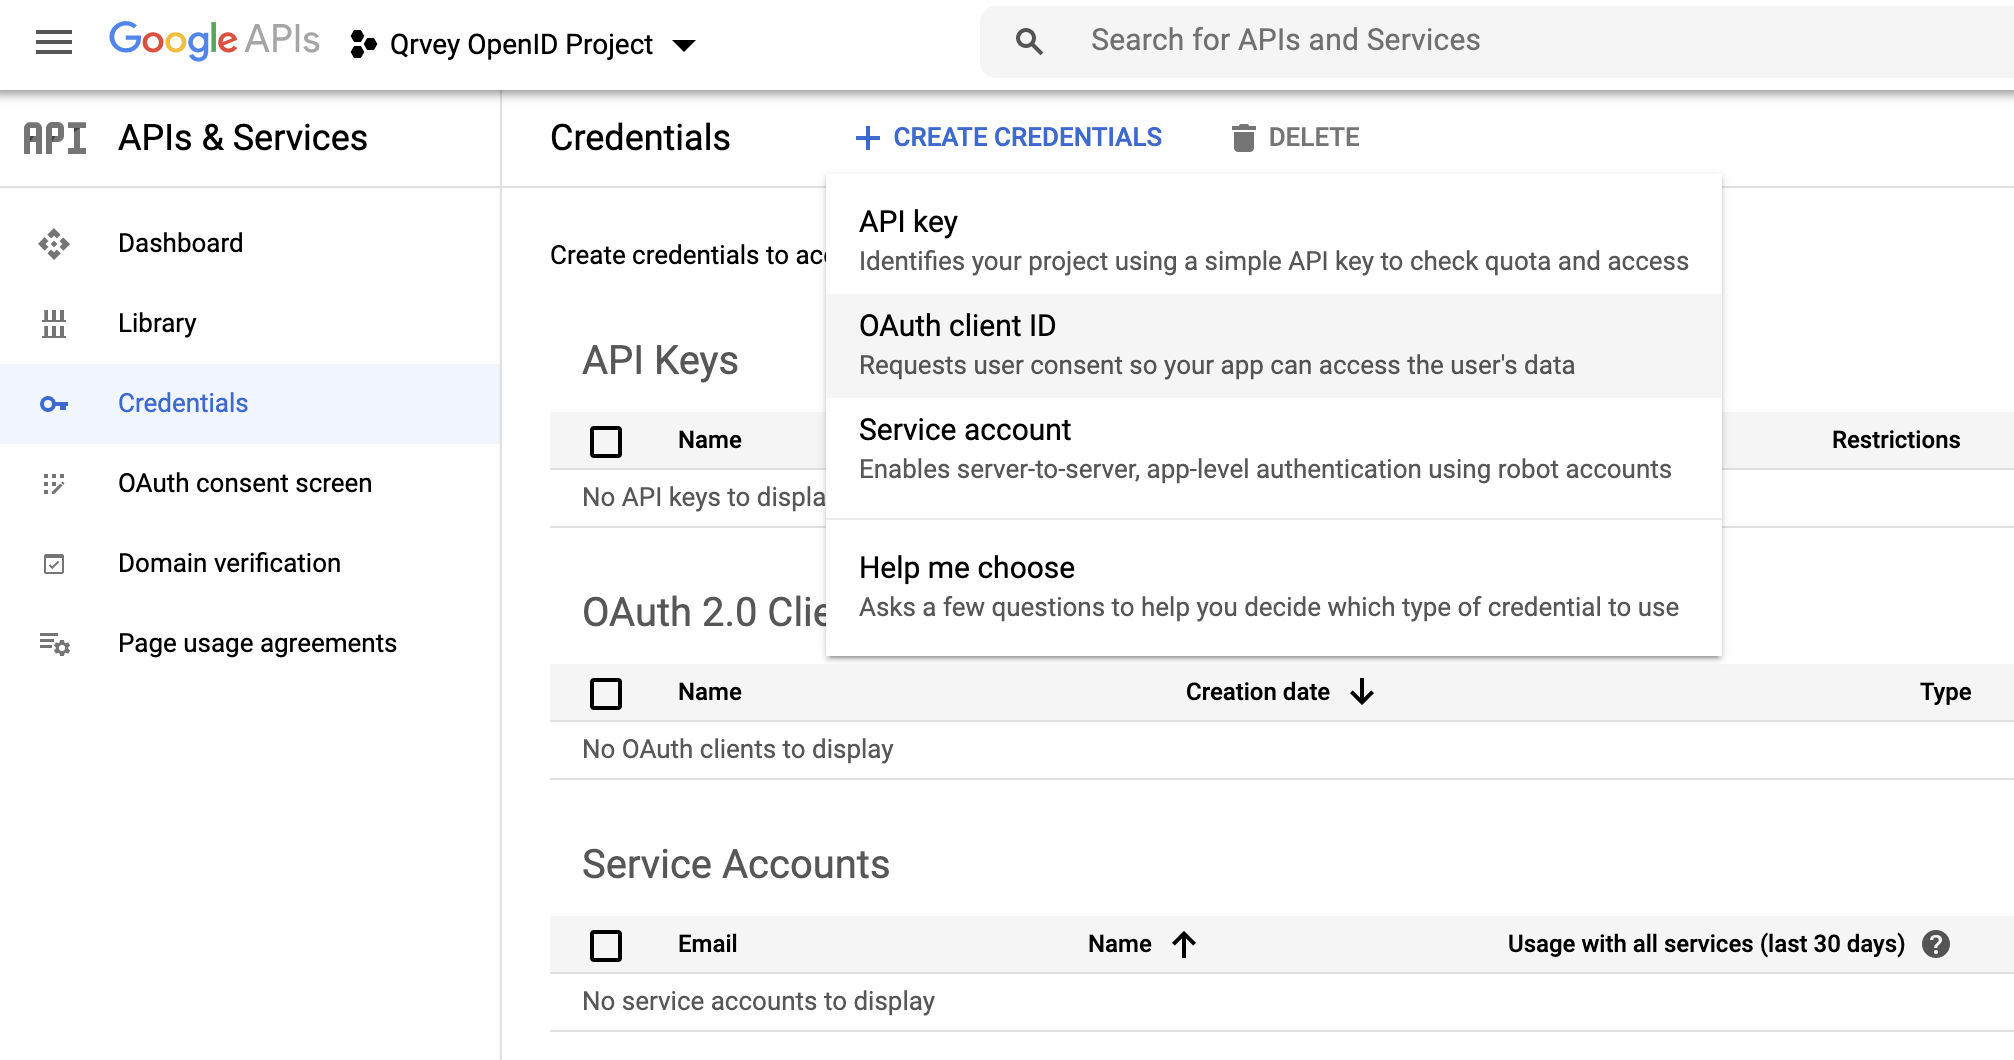
Open the Credentials page to generate OAuth 2.0 Credentials. Select OAuth Client ID.
-
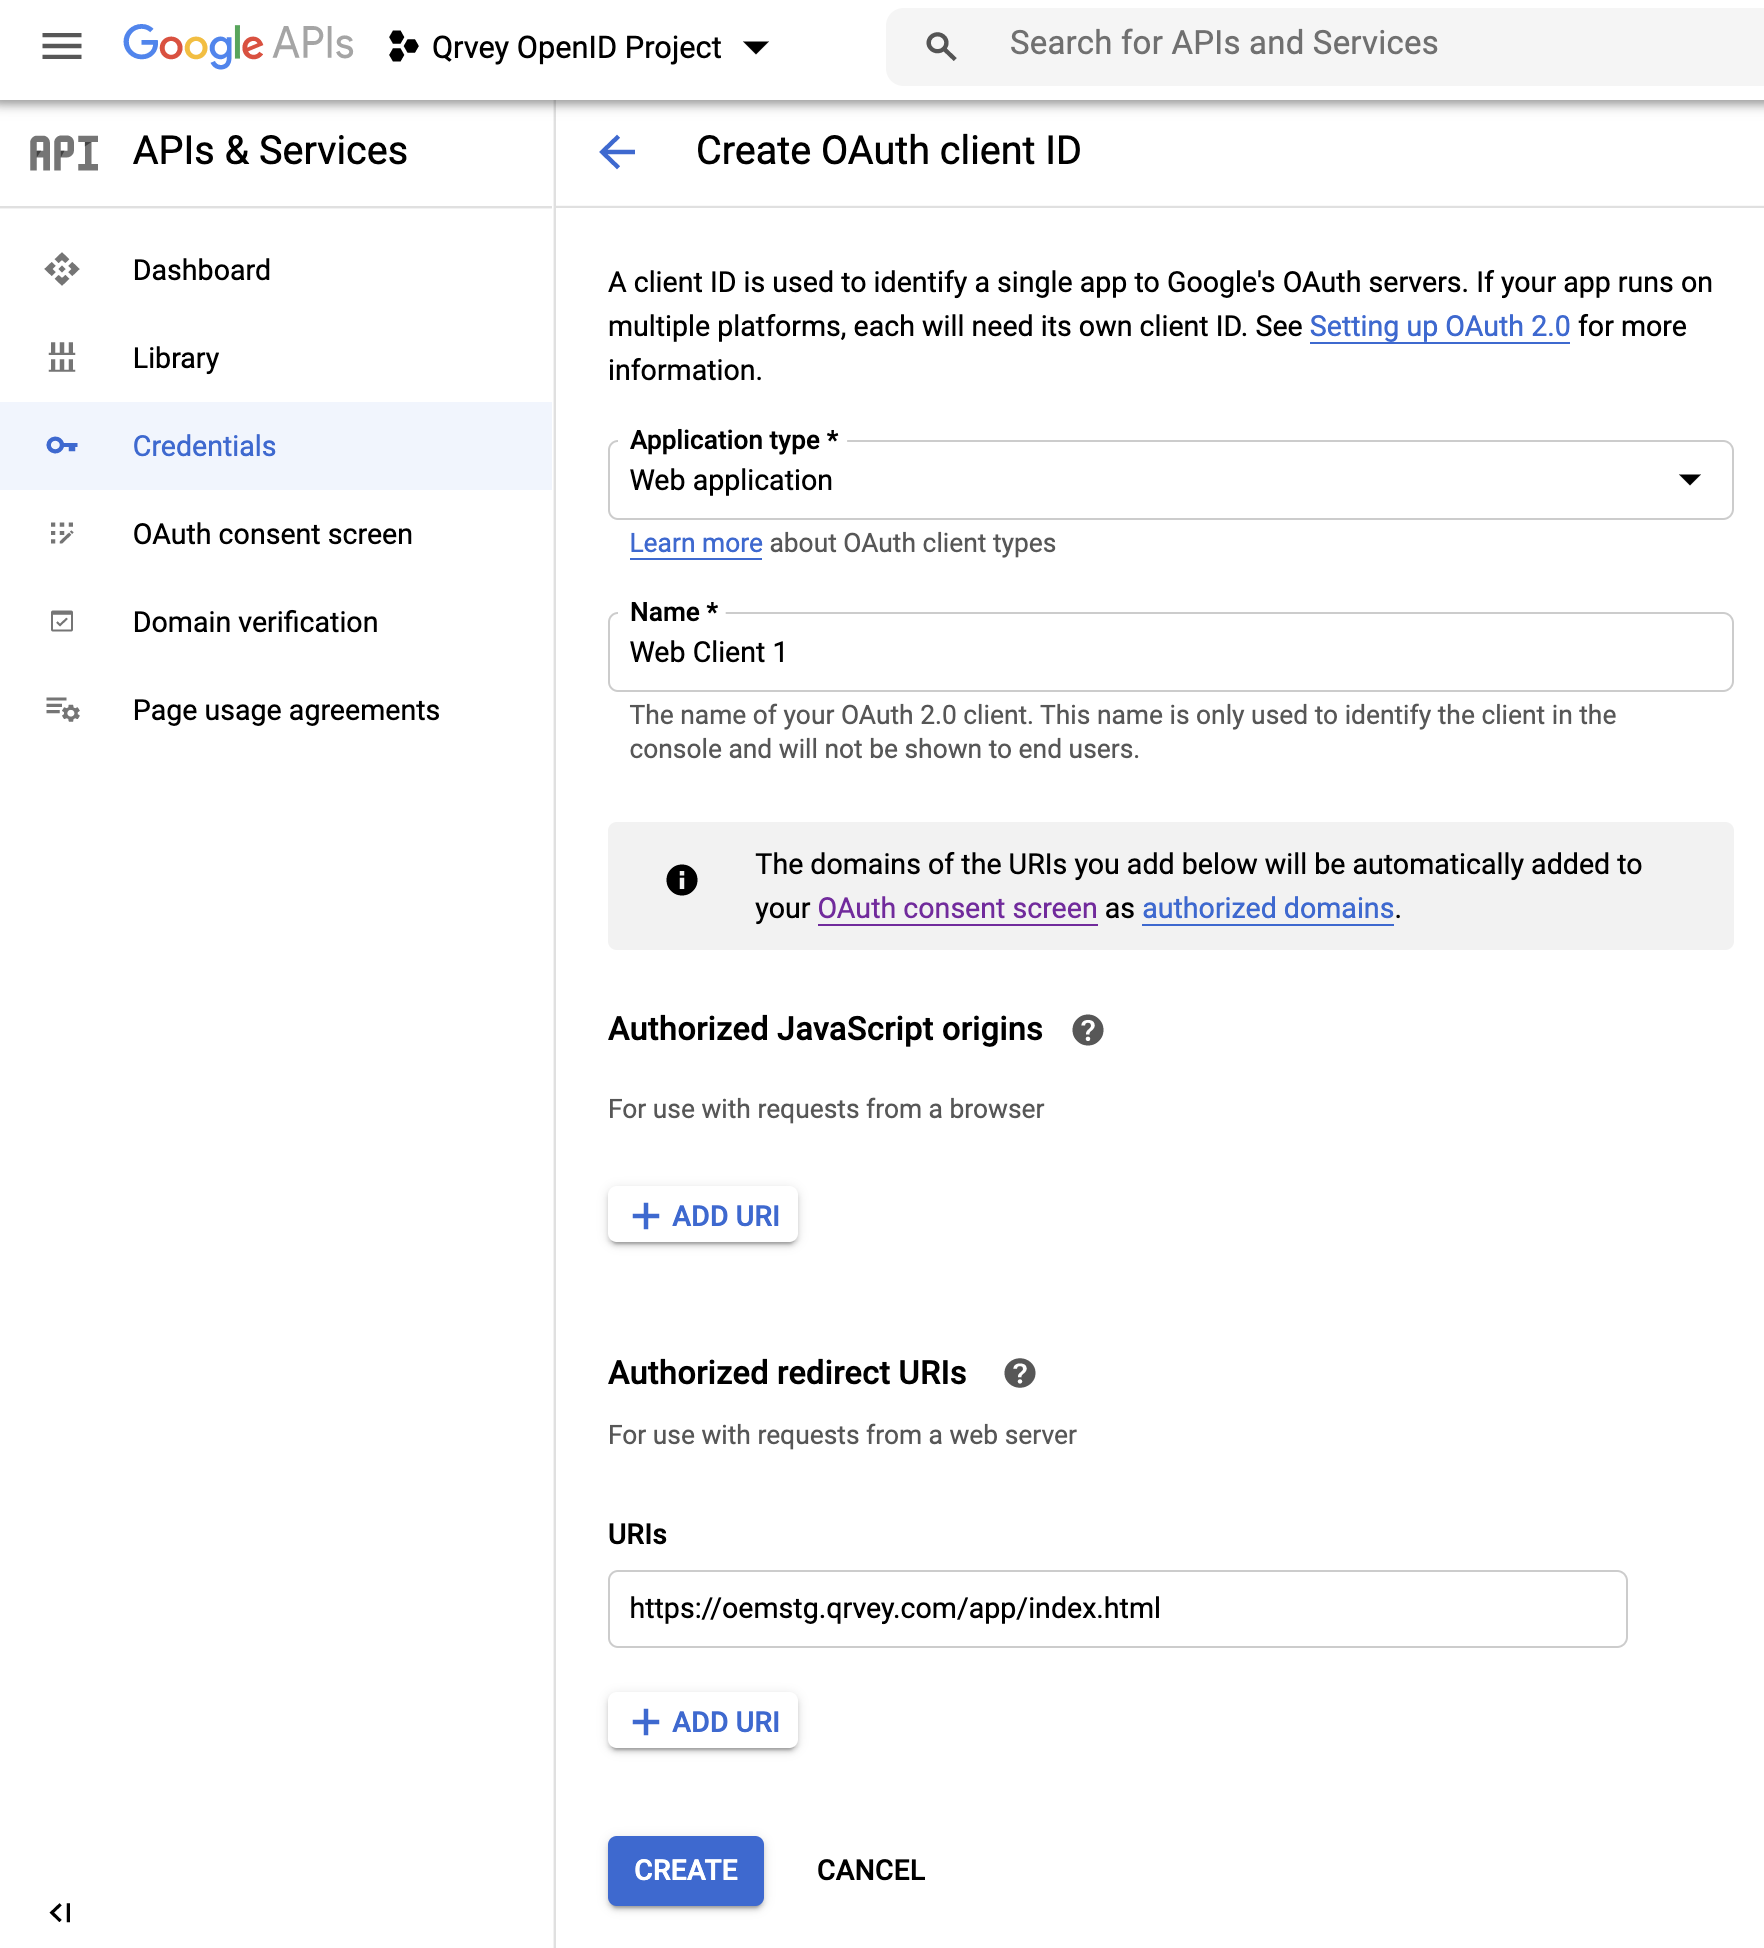
Select the Application Type and give the client a Name. Add the Return URL as authorized redirect URI.
-
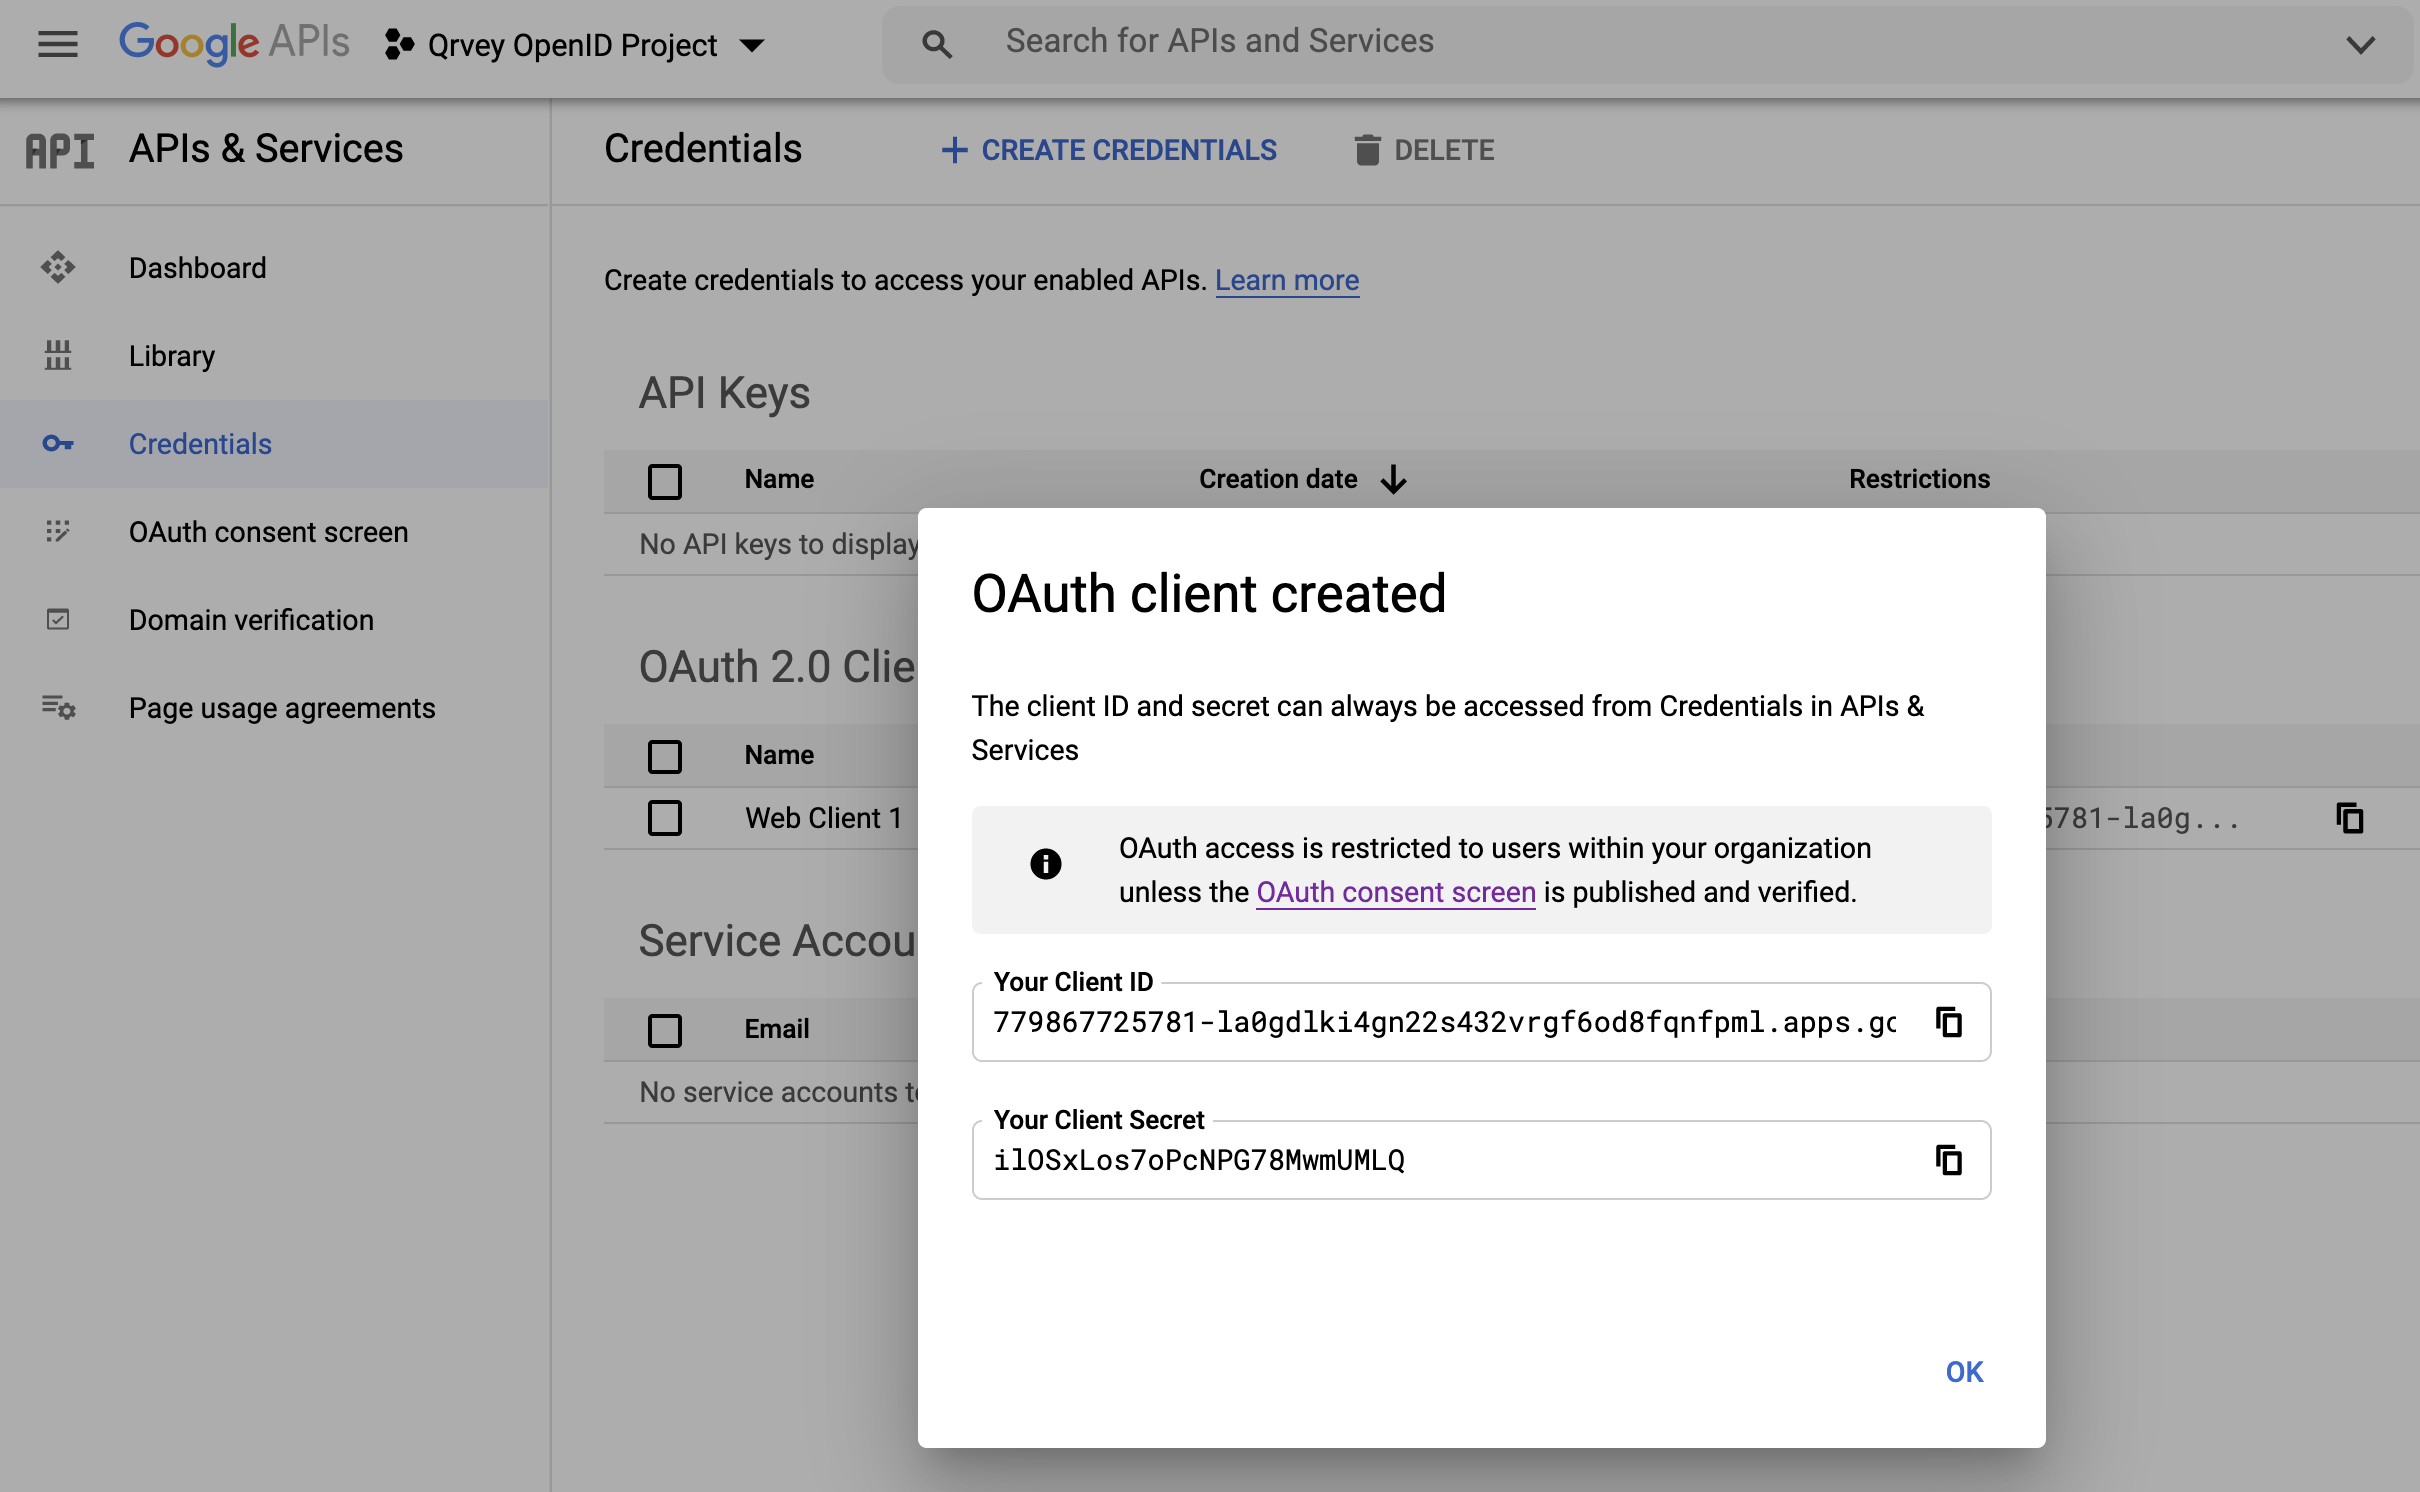
After the OAuth client has been created, you can view and copy the OAuth Credentials.
-
In the Qrvey Admin Center, open the User Management page and add the OpenID parameters to the Authentication tab. The following graphic shows how the Google OpenID entries map to the Authentication tab.
Google Realm URL:
https://accounts.google.com.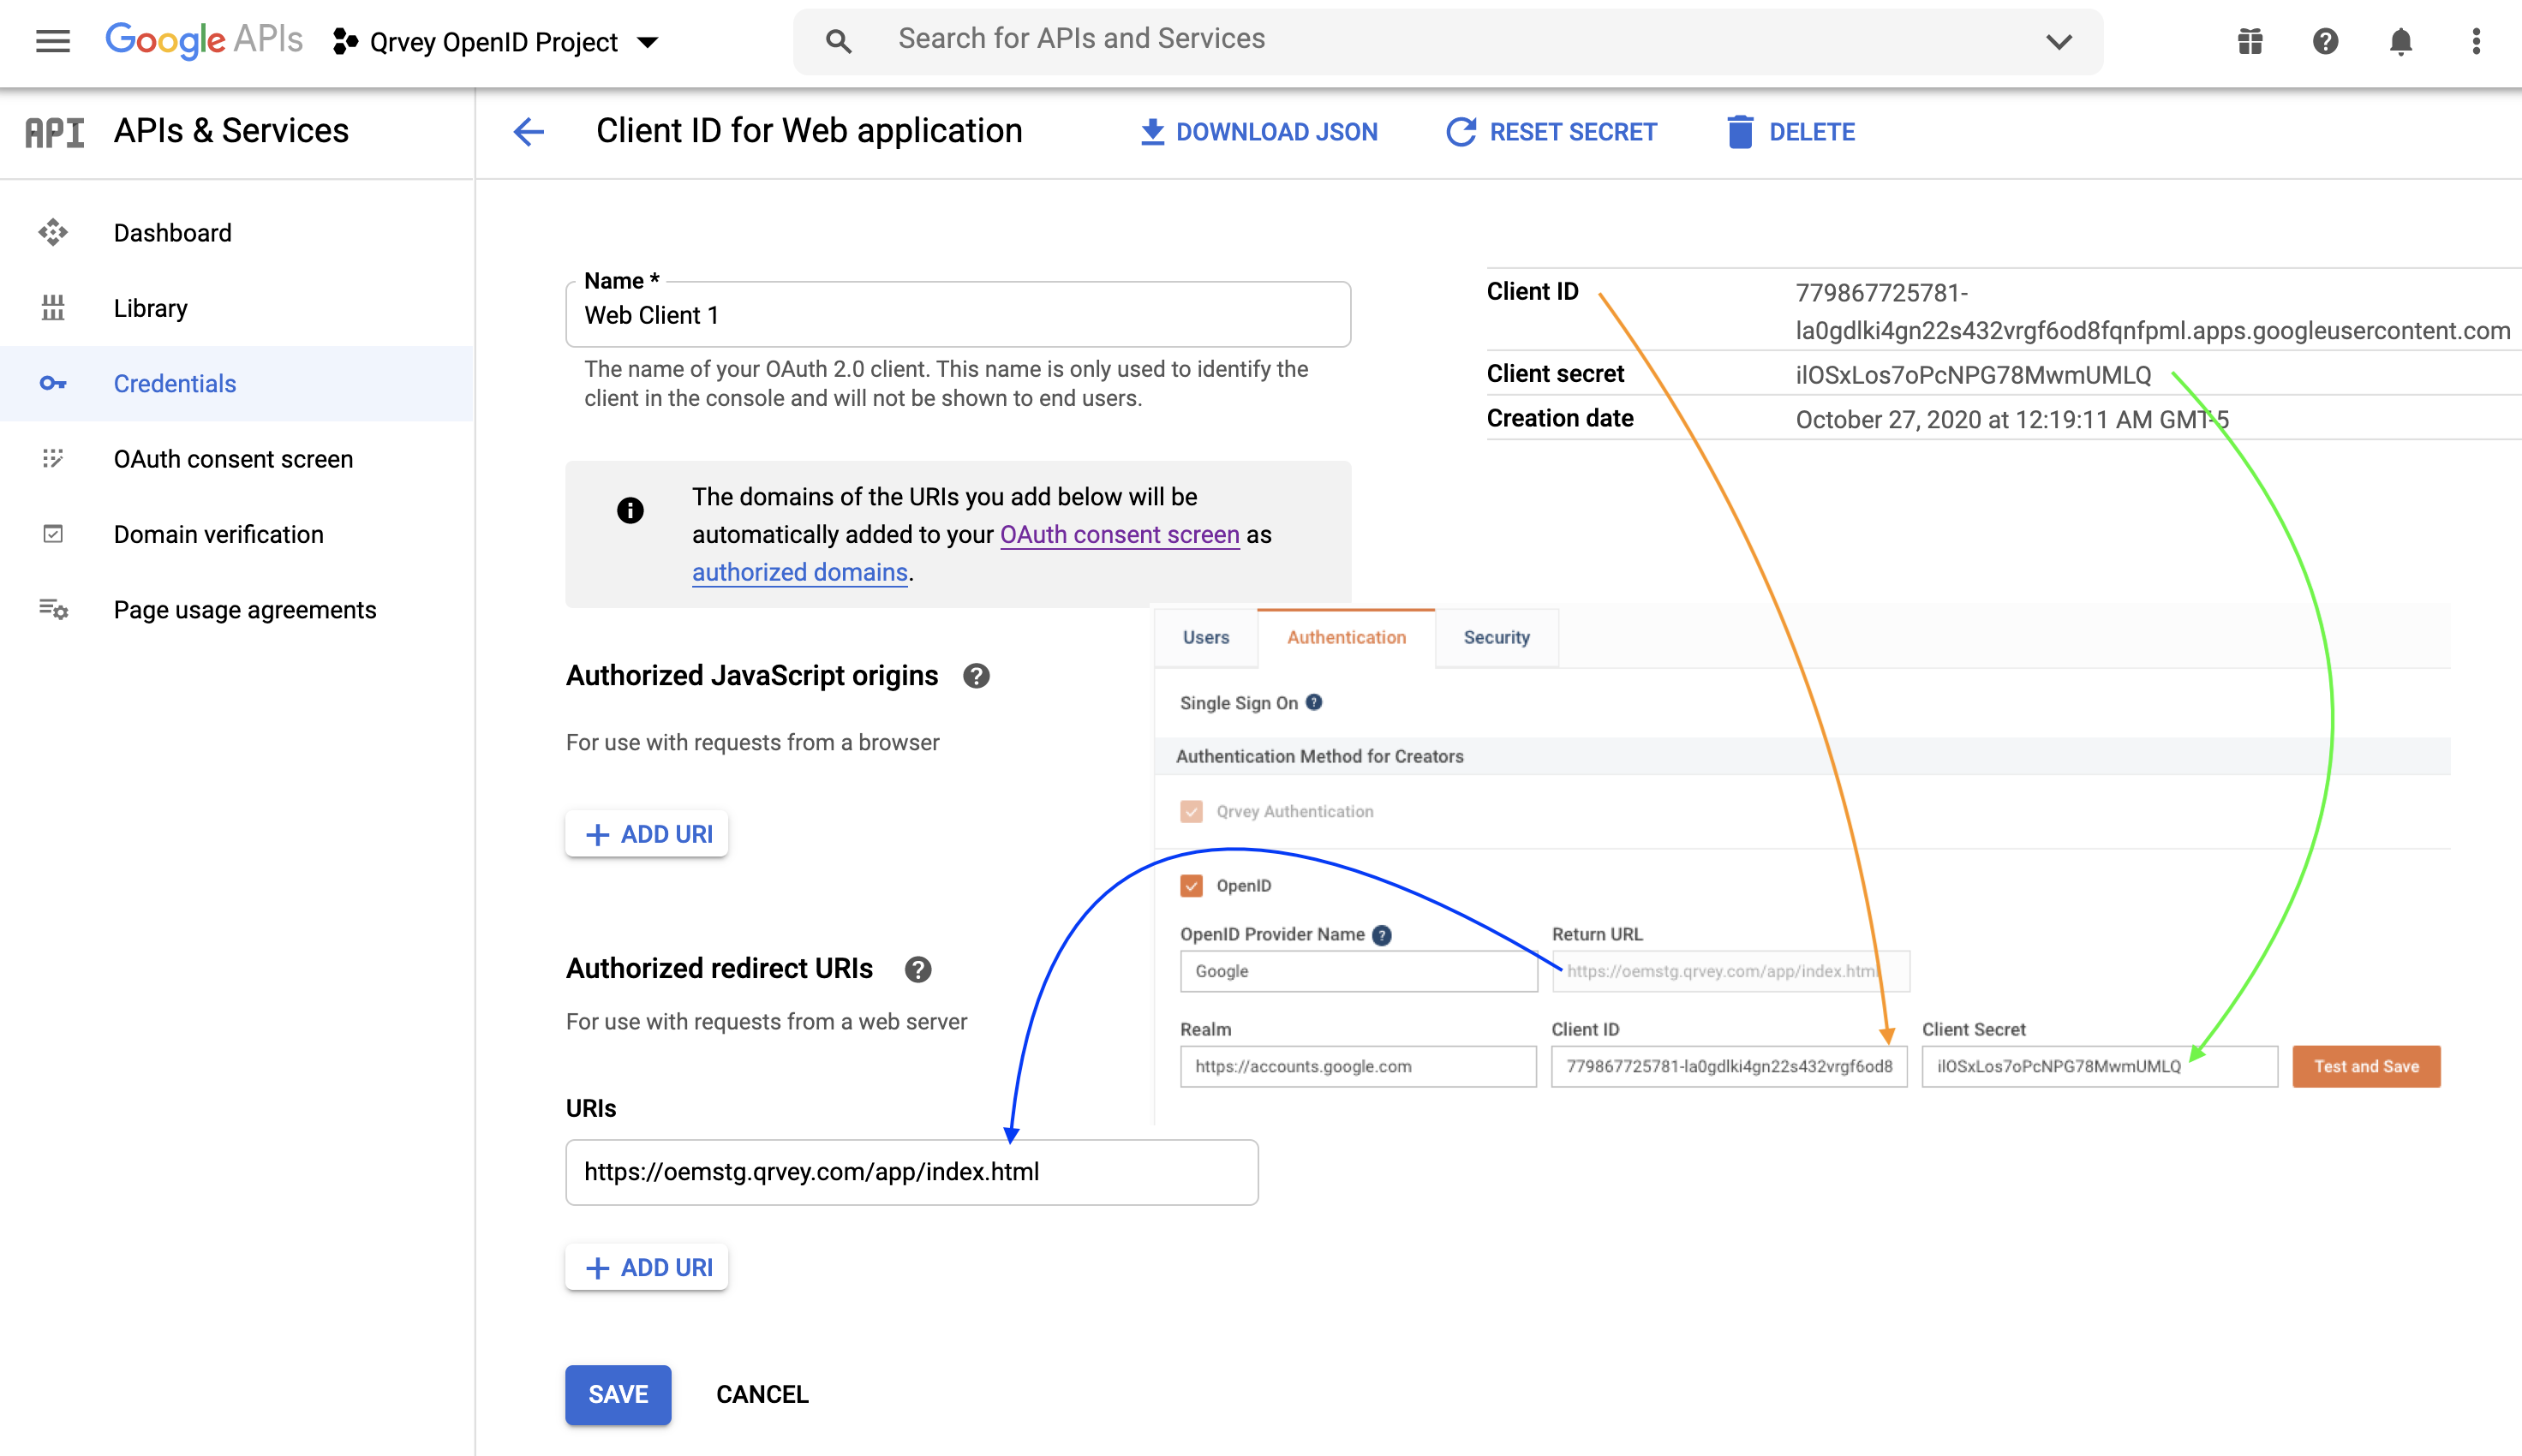
After you have added the parameters, select Test and Save to validate your integration.