Applications
After a user is logged in, they are directed to the Applications page, which serves as a Home page and displays all the Qrvey applications available to them. While navigating the app, a user can return to this page by clicking the home icon in the upper left corner of the Qrvey Composer user interface.

Create an Application
To create an application, follow these steps.
- Navigate to the Applications Page.
- Click Create Applicationin the upper left corner and a modal will appear.
- Provide a Name and Description, then click Next.
- Select Datasets and your application will be created.
Next, you'll want to import data into your Application.
Send an Application

To send an app to another Qrvey user, follow these steps.
- Navigate to the Applications page.
- Find the application you want to send and click its three-dot menu, then click Send.
- Select the email address of the Qrvey user you want to send your application to.
- Ensure the recipient has an active Qrvey account on the same instance.
- Optionally, modify the application's name and description.
- Click Send. You will see a green confirmation message once the application is sent.
- Sending may take several minutes based on the application's size.
Share an Application
By default, the applications you create in Qrvey Composer are private to your user account.
To share an application, follow these steps.
- Navigate to the Applications page.
- Find the application you want to send and click its three-dot menu, then click Send.
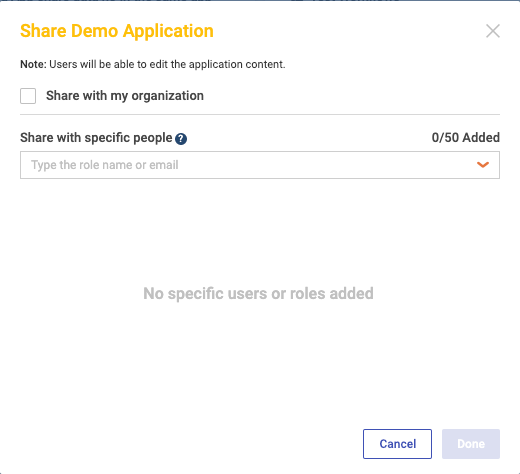
- The Share Application modal will appear.
- You have several sharing options:
- Select Share with my organization to share with all users in your organization.
- Select specific users and roles (please ensure Share with my organization is deselected).
- Click Done to share and exit.
Delete an Application
To delete an application, follow these steps.
- Navigate to the Applications Page.
- Find the application you want to send and click its three-dot menu, then click Send.
- Click Delete and a modal will appear.
- Click Delete to confirm.
Receive an Application

To install an application, follow these steps.
- Look for a notification number on the Received tab in the application dashboard.
- Click the application name for more details and then click Install.
- Once installed, a green notification confirms the application is ready.
- Installation time depends on the application size.
Application Settings

Use this module to configure the name, description, icon, and color scheme for a Qrvey application.
- Name & Icon — Click to edit the name and the description of the application, as well as upload an application icon.
- Primary Color: Choose the primary color for your toolbar and navigation elements.