Prepare Your AWS Account
Qrvey will deploy to your AWS account using a CloudFormation template. CloudFormation templates enable you to automate the deployment process of the AWS services required to run the Qrvey system. The following steps will walk you through the deployment process.
Step 1: Create an AWS Account
If you are deploying Qrvey to a new AWS account, please follow these steps. Otherwise, you can jump to Step 2.
If you already have an AWS Account then you can use AWS Organizations service to create a child AWS Account. To create a new account using AWS Organizations, follow the steps mentioned here and then jump to Step 2 in this document.
Navigate to “https://aws.amazon.com” and click on the Create an AWS Account button:

More information about creating an AWS account can be found here.
Fill out the form with the appropriate information:
- Root account Email
- Password
- Alias to easily reference this account

Fill out Contact Information:

Enter Payment Information:

Verify Account using Email or Phone number verification. Once done, you should see the following confirmation:
Pick desired Support plan (if needed):

Step 2: Create a Cross-Account IAM Role
This is a required step if the Qrvey team is going to do the deployment. You can skip this step if you are deploying on your own. This step will create a new IAM role in your AWS account used to deploy the Platform.
- Log into AWS Console (using the email and password created in the last step):

- Select your region from the top-left region dropdown:

- Navigate to AWS IAM (Identity and Access Management):

- Click on Roles Menu group:

5.Click on Create Role and select Another AWS Account in step 1. Enter the AWS AccountID that you received from Qrvey (6381xxxxxxxx). We recommend checking the Require MFA option for this role. This will ensure that anyone accessing your AWS account from Qrvey’s environment would use MFA for login.

- Select “AdministratorAccess” in step 2 (this is a high permission but we only need it to be able to deploy all the services we use in Qrvey Platform). You can remove this permission once we have deployed the platform (about 1-2 days). If you prefer to provide limited access for deployment you can use the permissions listed in the policy document here.

- In the next step, add as many optional tags as needed:

- In the next step, enter a name for this new role, review all the information and click on Save.

- The new role should have been created now. From the Roles list page, click on the name of the role you have just created to see its details. Copy the URL for Give this link to users who can switch roles in the console from the role details page. Save this URL somewhere as you’ll be sending this to Qrvey’s deployment team in the last step.

Step 3: (Optional) Create a new VPC
The Qrvey platform can be deployed into your existing VPC and subnets, and it supports different combinations of Public and Private subnets. To keep things simple, we recommend using the Default VPC or create a new VPC using the wizard. Follow these steps to create a new VPC in your AWS account:
- Log in to the AWS console. Verify that your user account has sufficient permissions to create a VPC and related resources.
- Select the region from the dropdown (top right of console) where Qrvey platform will be deployed.
- Navigate to the AWS VPC Service Console.

- Click Create VPC to open the Create VPC wizard.

-
Select the following options:
- Resources to create: select VPC and more.
- Name tag auto-generation: Enter any name for your reference.
- IPv4 CIDR block: Select a unique CIDR block. Make sure the CIDR block would not overlap with any other VPC, in case you plan to set up VPC Peering for database connection. Minimum CIDR range required is /26.
- Number of Availability Zones (AZs): Select 2 or more.
- Customize AZs: You can change the AZs or leave them as default.
- Number of public subnets: Select the value that matches the number of AZs.
- Number of private subnets: Select at least 2 if you plan to use private subnets to connect to your database (using VPC Peering or similar).
- Customize subnets CIDR block: Change the settings or leave them as default.
- NAT gateways ($): If you have private subnets, select at least one AZ (for production environments, we recommend one per AZ for high availability).
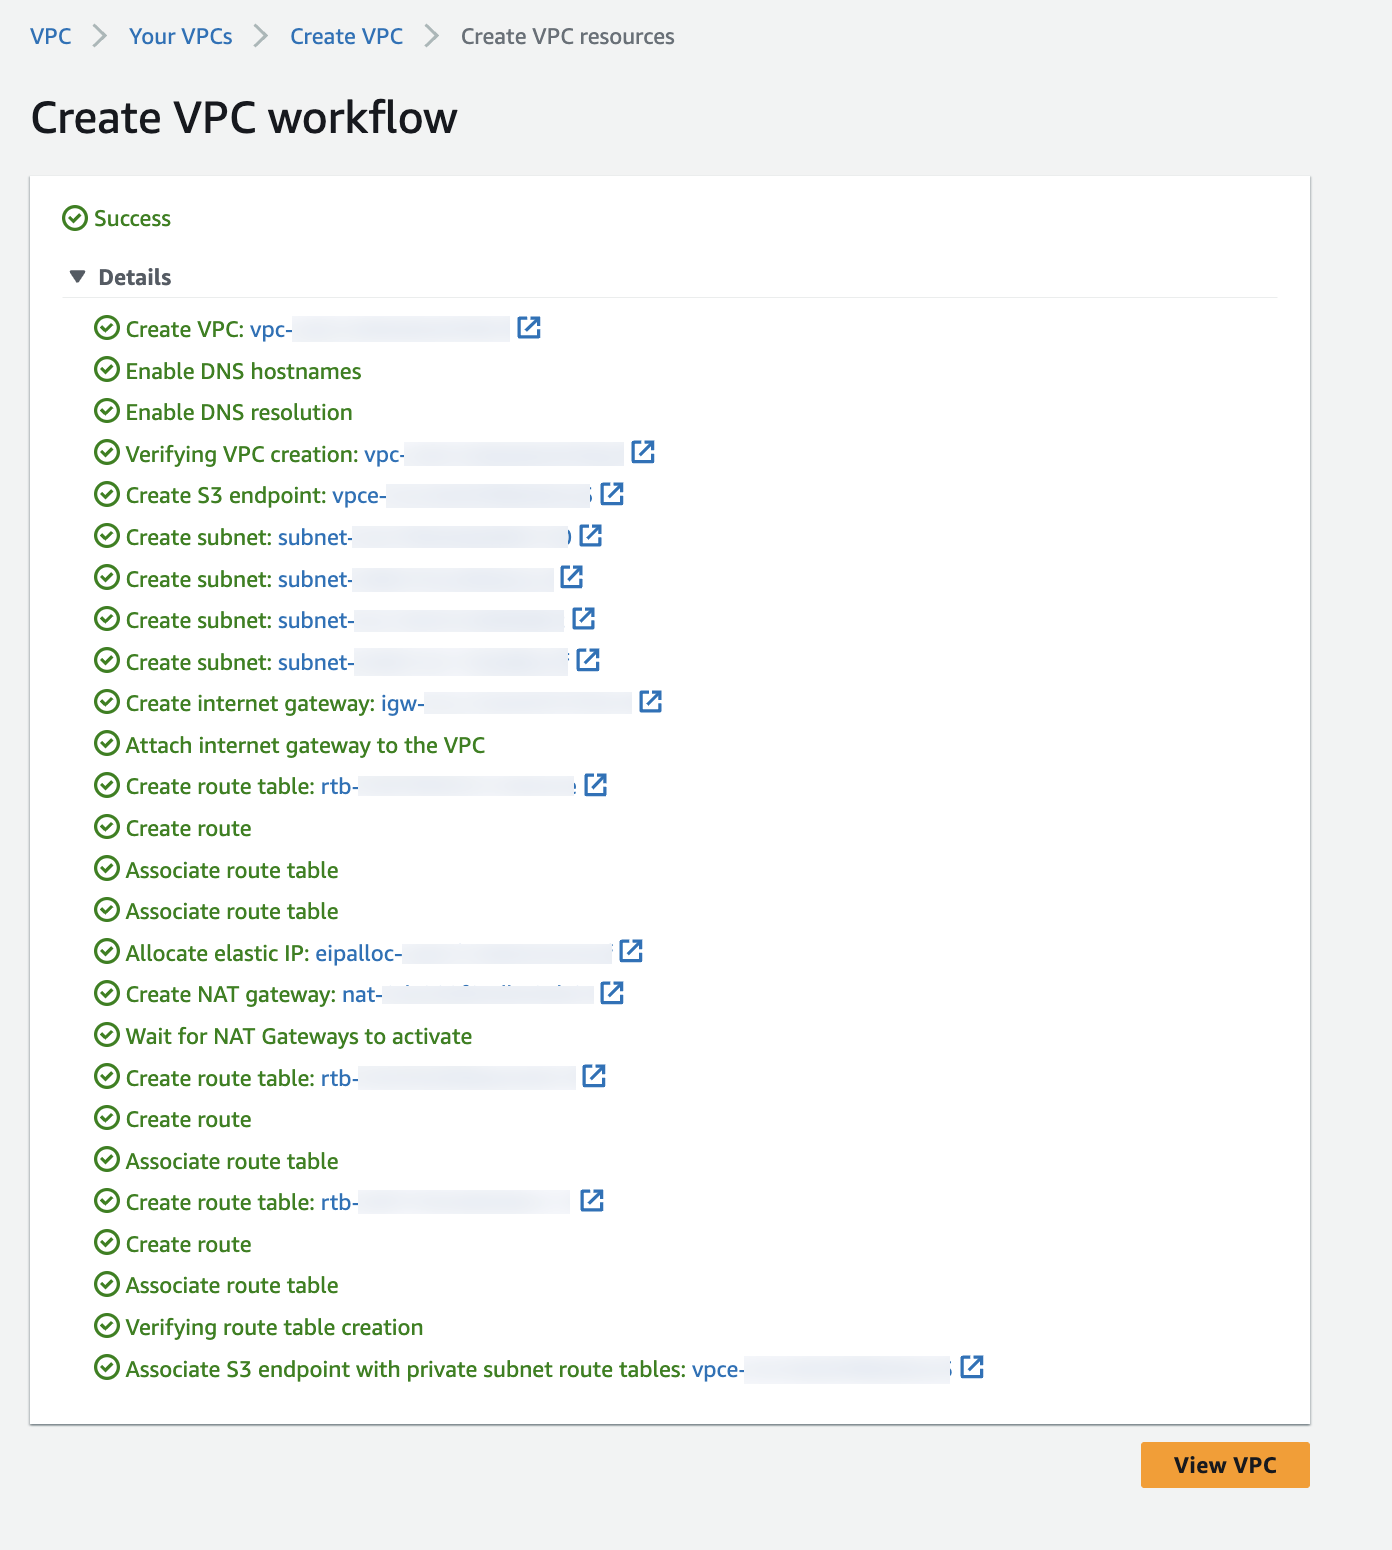
- You can leave the rest as default. Verify the settings and click Create VPC.

-
Wait for the VPC to be created.
-
Navigate to the Subnets tab in the VPC console and filter the list by the VPC.
-
For each subnet in the list, update the Auto-assign public IPv4 address flag to True.
- Select a subnet, click the Actions dropdown, and select Edit subnet settings.

- Select Enable auto-assign public IPv4 address, and then click Save.

Step 4: Send Info to Qrvey
Please send the following information to Qrvey’s deployment team:
-
AWS IAM Role URL (Step 2)
-
Sample Email Body (to be sent to Qrvey at help@qrvey.com)
IAM Crossaccount role URL: https://signin.aws.amazon.com/switchrole?roleName=QrveyxxxxxRole&account=9653xxxxxxxx
Step 5: Move SES out of Sandbox (Offline)
AWS enables SES in sandbox mode by default. While you can move SES out of sandbox mode at any time, this step is required to send emails from the Qrvey system.
To move SES out of sandbox mode, you must create a support ticket with AWS. AWS usually takes about 1 day to approve this request so we suggest doing this as soon as possible. Here are the steps to open this support ticket:
- Log into AWS console and navigate to AWS SES :

- Click on the Request a Sending Limit Increase button and fill out the form:


- In the case description, please fully describe your email-sending scenarios. For example, will they only be sent to people who subscribe through your application, or will you be sending emails using uploaded address lists? It is also helpful to indicate your expected email-sending volume.

Once you have submitted this request, it usually takes AWS 1 day to approve this but they may follow up for additional information. Feel free to contact Qrvey support team at help@qrvey.com if you have any questions or need help.
Final Step
Once the deployment is done and Verified, Qrvey’s deployment team will email the following information to you:
-
Account Credentials:
- Composer:
- API-Key
- Admin Portal:
- Username
- Access Key
- Data Router:
- API Key
- S3 Bucket
- Widgets:
- Launcher URL
- ANView URL
- Elasticsearch URL
- Composer:
-
Useful Links:
- Developer Docs
- [API reference](../software-developer/introduction-to-software-development.md