Set Up Qrvey AI Sidekick
Qrvey Sidekick is an AI-powered conversational interface that enables users to interact with their data using natural language. As a Qrvey Administrator, you can configure and manage this AI assistant from the Admin Center. Developers can then embed the Sidekick directly into their applications.
Before You Begin
JWT authentication is required for all Qrvey Sidekick integrations.
Connect to an AI Provider
Administrators can enable and configure the Qrvey Sidekick from the Admin Center.
-
From the Admin Center, go to Customization > Features and open the AI tab.
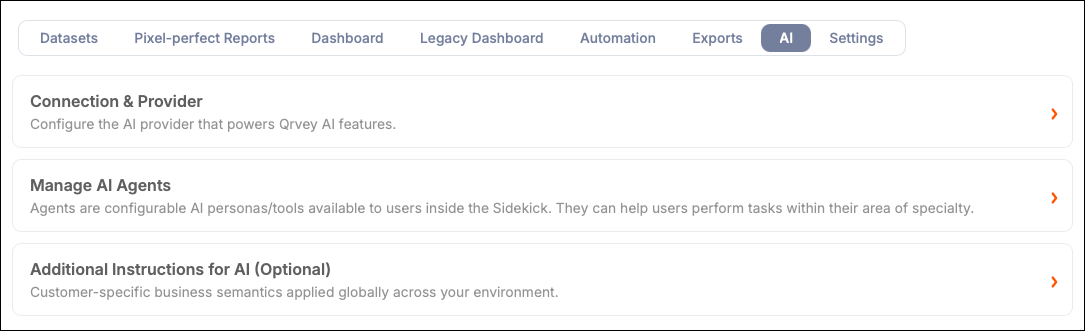
-
Expand the Connection & Provider panel.
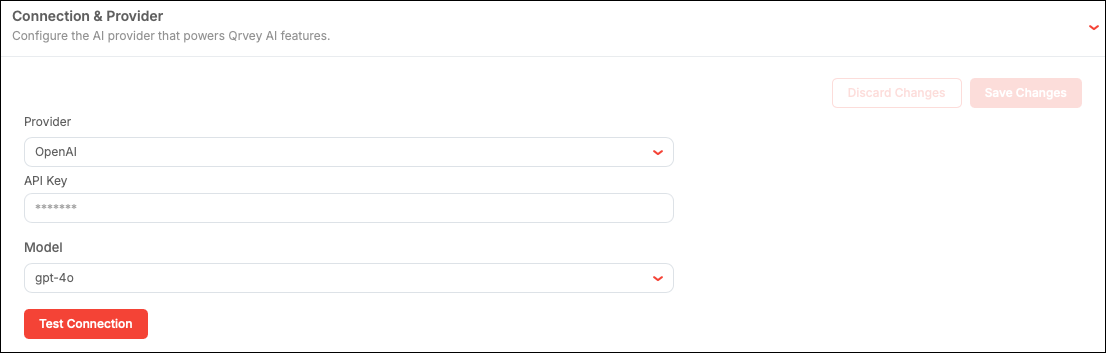
-
Select an AI provider from the dropdown.
-
Add the credentials and connection information for your provider:
Field Required Task Example / Format OpenAI API Key Yes Paste the secret key you copied from the OpenAI dashboard. sk-proj-xxxxxxxxxxxxModel No GPT model to use for AI features. Common models include:
-gpt-4o- Most capable multimodal model (recommended)
-gpt-4o-mini- Faster and more cost-effective
-gpt-4-turbo- High capability with large context
-gpt-3.5-turbo- Lightweight and economical
Leave blank to use the platform default.gpt-4oAzure OpenAI API Key Yes One of the two API keys from the Azure portal (Keys and Endpoint section). a1b2c3d4e5f6...Endpoint URL Yes Endpoint URL from the Azure portal. Include the full URL with https://.https://my-resource.openai.azure.com/Azure Model ID No Deployment Name you set when deploying the model. Leave blank to use the platform default. my-gpt4oAPI Version Yes Azure OpenAI REST API version. The platform pre-fills a tested default. 2023-12-01-previewClaude in Amazon Bedrock Access Key ID Yes AWS IAM access key ID for programmatic access. AKIAIOSFODNN7EXAMPLESecret Access Key Yes AWS IAM secret access key paired with the access key ID. wJalrXUtnFEMI/K7MDENG...AWS Region Yes AWS region where Bedrock and the Claude model are available. us-east-1Model ID No Bedrock model identifier for the Claude version to use. To use the platform default, leave this field blank. anthropic.claude-3-5-sonnet-20241022-v2:0 -
Select Test Connection to validate Qrvey's connection to the model.
-
After you have validated the connection, save your changes.
A set of built-in AI agents is available by default. You can create more agents within Sidekick.
Troubleshooting
The following sections describe common issues encountered when creating a connection to an AI provider.
OpenAI
| Issue | Resolution |
|---|---|
| Incorrect API Key | Verify there are no leading or trailing spaces when pasting. |
| Quota exceeded | Add billing credits. |
| Model not found | Verify the model name is spelled correctly and your account has access. |
AzureOpenAI
| Issue | Resolution |
|---|---|
| 401 Unauthorized | API Key is incorrect. Verify it matches KEY 1 or KEY 2 from the portal. |
| 404 Not Found | Check the Endpoint URL and ensure the Model Deployment exists. |
| DeploymentNotFound | Azure Model ID doesn't match any deployment. Check exact capitalization. |
| API Version error | If you receive a version-related error, update the API Version field to the latest in the Azure OpenAI in Microsoft Foundry Models REST API reference. |
Claude in Amazon Bedrock
| Issue | Resolution |
|---|---|
| AccessDeniedException | The IAM user does not have bedrock:InvokeModel permission, or model access was not approved. |
| UnrecognizedClientException | The access key ID or secret access key is incorrect. |
| ValidationException | Invalid Model ID format. Copy it from the Bedrock console. |
| Region mismatch | Verify the selected AWS Region matches the region where you enabled model access. |
Manage AI Agents
When your AI provider has been connected, the following AI agents are available (default: disabled). They use Qrvey's MCP server.
- Qrvey Smart Analyzer
- Qrvey Analytics Assistant
- Qrvey AI Chart Builder
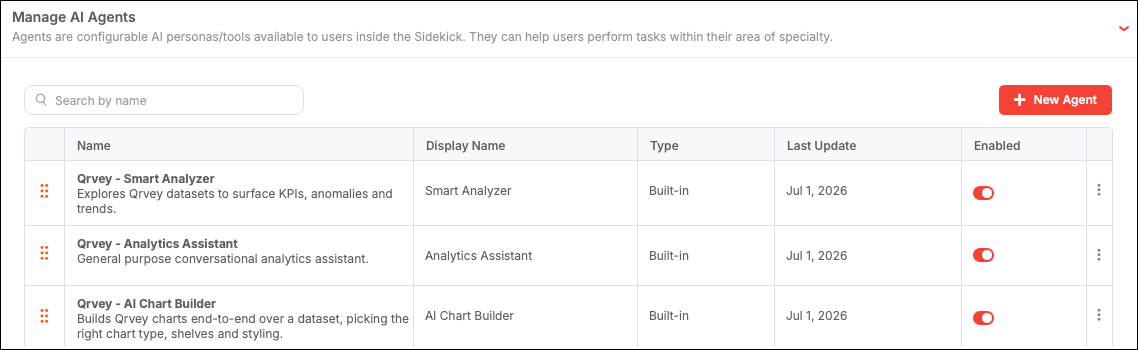
While you cannot edit the configuration settings for these built-in agents, you can change their names and descriptions. You can use the options menu to duplicate an existing agent and edit its settings. However, the keyword Qrvey is reserved for built-in agents and cannot be used during customization.
Create an AI Agent
You can create additional agents to incorporate business- or industry-specific criteria.
-
From the AI tab, expand the Manage AI Agents panel.
-
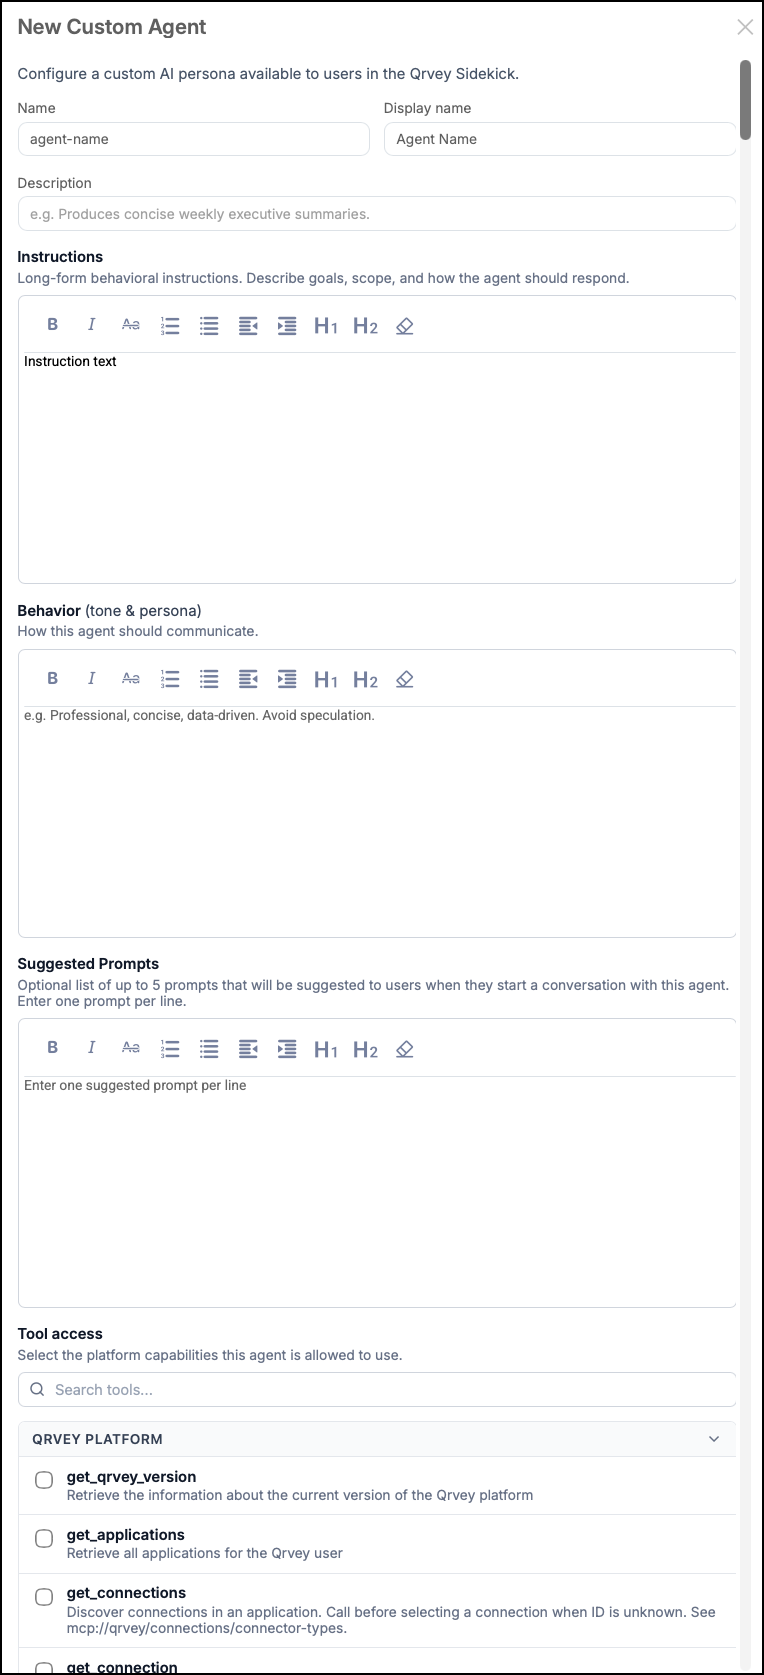
Select New Agent to open a modal.
-
Add a name (system ID), display name, and description in the fields provided.
-
In the Instructions field, add long-form prompts to help the agent generate its responses. These prompts can capture goals, scope, and constraints.
-
In the Behavior field, add prompts to capture tone and persona when the agent generates its responses.
-
In the Suggested Prompts field, add prompts to provide suggestions to users when interacting with the agent.
-
In the Tool access section, select one or more capabilities used by this agent.
-
Select Create Agent to save the configuration.
If you create multiple agents, you can drag and drop them within the Manage AI Agents panel to change their display order when a user opens the Qrvey Sidekick.
Add Business-Level Instructions
Business-level instructions provide additional context to Qrvey's Sidekick's system-level instructions, improving the accuracy and relevance of AI responses for specific customers.
-
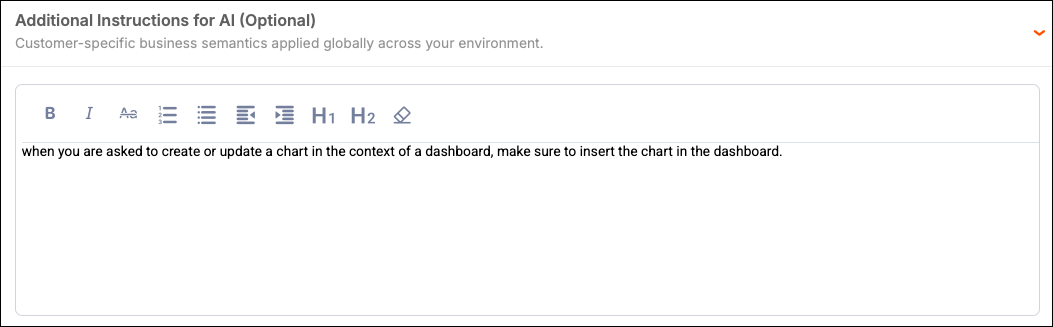
From the AI tab, expand the Additional Instructions for AI (Optional) panel.
-
Add any custom instructions in the Instructions field. Such instructions include the following:
- Define business-specific terminology. These instructions are always applied when present.
- Specify preferred aggregation methods (agent level). These instructions are applied only when using the agent.
- Provide context about the data source (entity level). These instructions are applied when the entity is used in any context.